
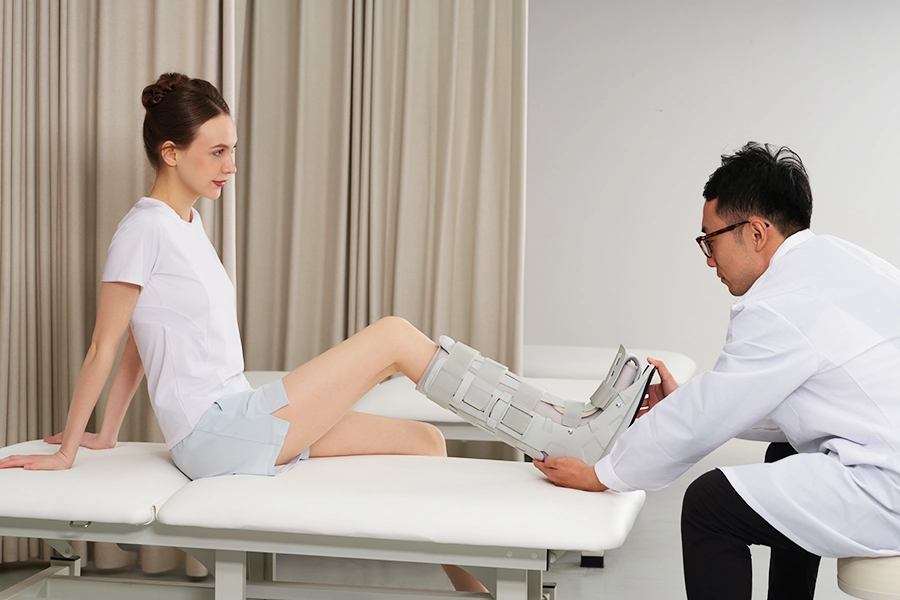
Most people leave the hospital with an orthopaedic boot (a kind of medical brace) strapped to their foot, but almost no real instruction on how to use it. So they shuffle, limp, and brace through every step, wondering why their back hurts by noon.
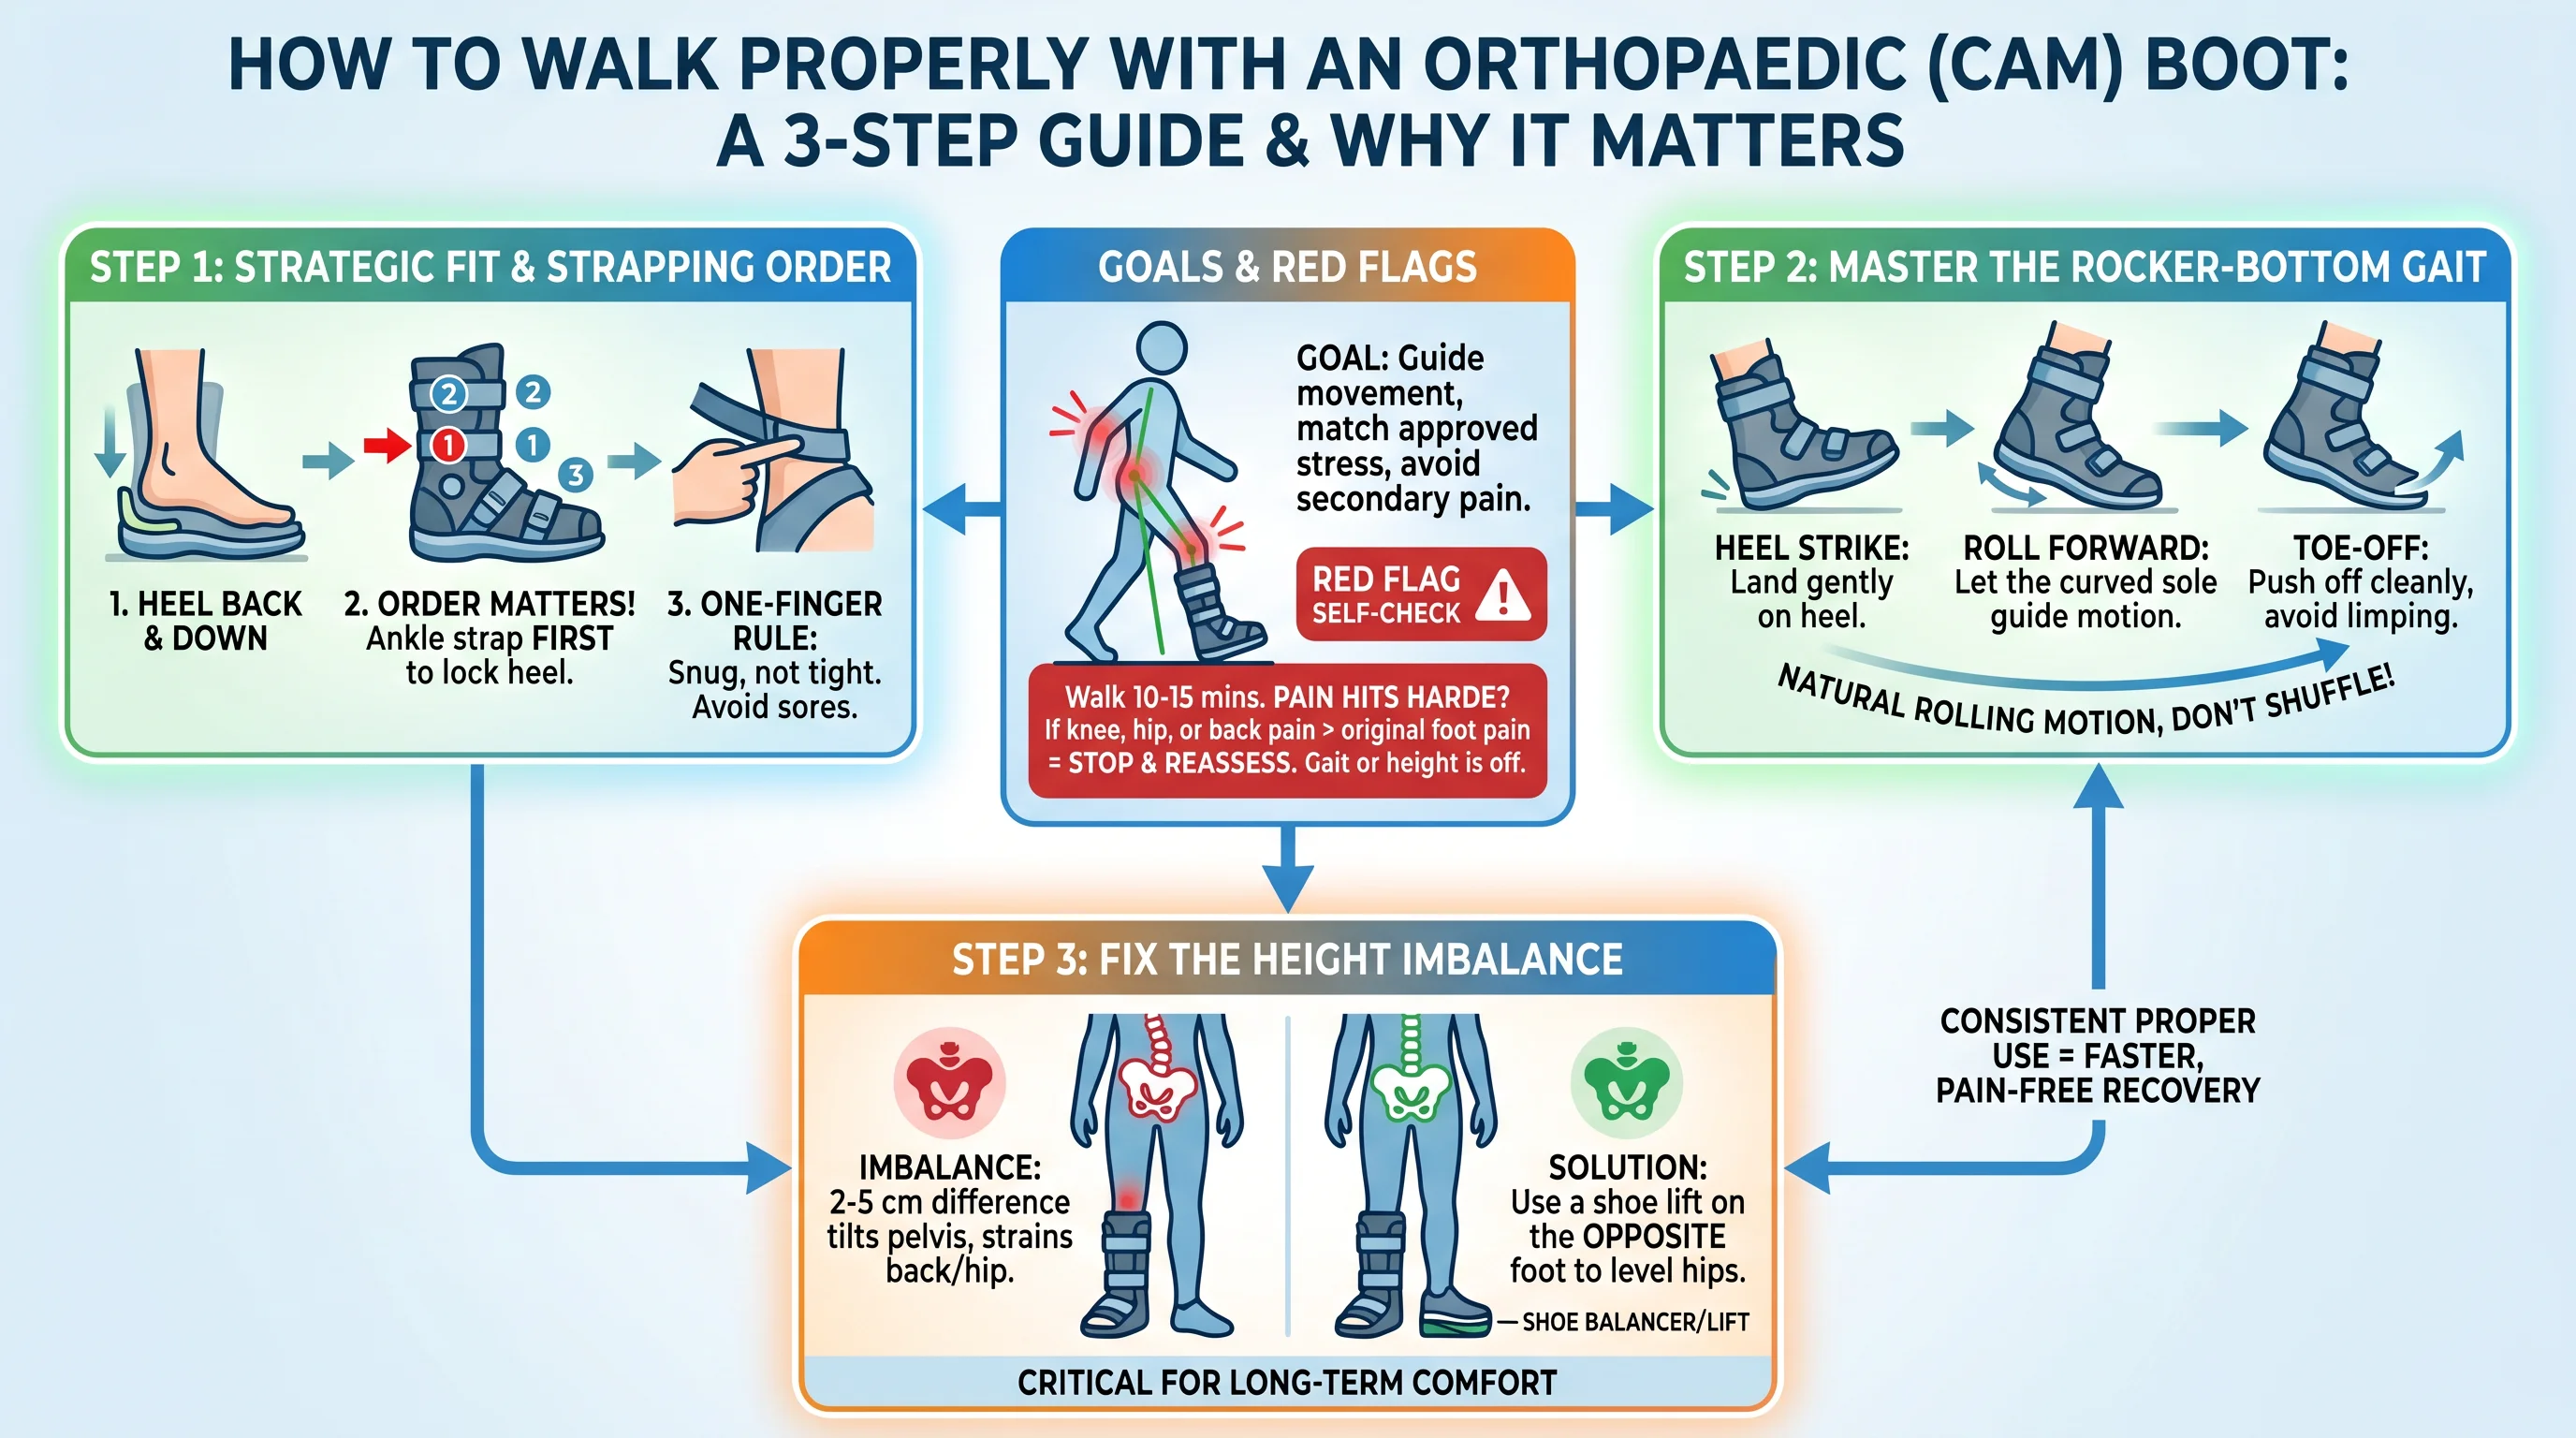
The orthopaedic boot is not the problem; walking in it the wrong way is. Whether you have a stress fracture, a sprained ankle, or are recovering from surgery, how you move inside that CAM boot matters far more than most clinicians take time to explain. This guide covers the essentials: getting the fit right, mastering heel-to-toe rolling, fixing the height imbalance that affects your hips, and returning to easy walking once the boot comes off.
What Does “Walking Properly” Mean in an Orthopaedic Boot?
Proper walking in an orthopaedic boot has a clear medical definition, and it goes well beyond “don’t fall over.”
The goal is straightforward on paper. The stress reaching your injured bone or tissue must match what your doctor has approved. Your overall movement also needs to stay as close to a natural, symmetrical gait as the boot allows, without your knees, hips, or lower back silently taking on the extra load.
Your boot isn’t designed to replace normal movement. It’s designed to guide it. The rocker bottom sole is built to copy the heel-to-toe rolling motion your foot would produce on its own, but it can only do that job if you let it.
Gait mechanics breaking down doesn’t just hurt the injury site. A height difference of just 2–5 cm between your booted foot and your regular shoe pushes your pelvis into a constant sideways tilt. Within days, that strain travels upward into your lumbar spine, your hip flexors, and your knee.
Here’s a quick self-check you can do right now:
- Walk for 10–15 minutes
- Notice where the pain hits hardest
- Your knee, hip, or back pain topping your original foot pain is a red flag
That’s your body telling you something is off, either your gait or your shoe height needs adjusting. Stop and reassess before you keep going.
Step 1: Fit the Orthopaedic Boot Right Before You Take a Single Step
A bad boot fit doesn’t just feel uncomfortable; it works against your recovery.
Sit down first. Pull on a tall sock to cut friction at the boot’s upper edge. Then slide your foot in and push your heel all the way down to the base and back into the heel cup.
Strap It in the Right Order
- Start with the ankle strap, then the top strap, then work through the rest. This order matters. The middle ankle strap is what drives your heel back and down into the right position. Get that one set before touching the others.
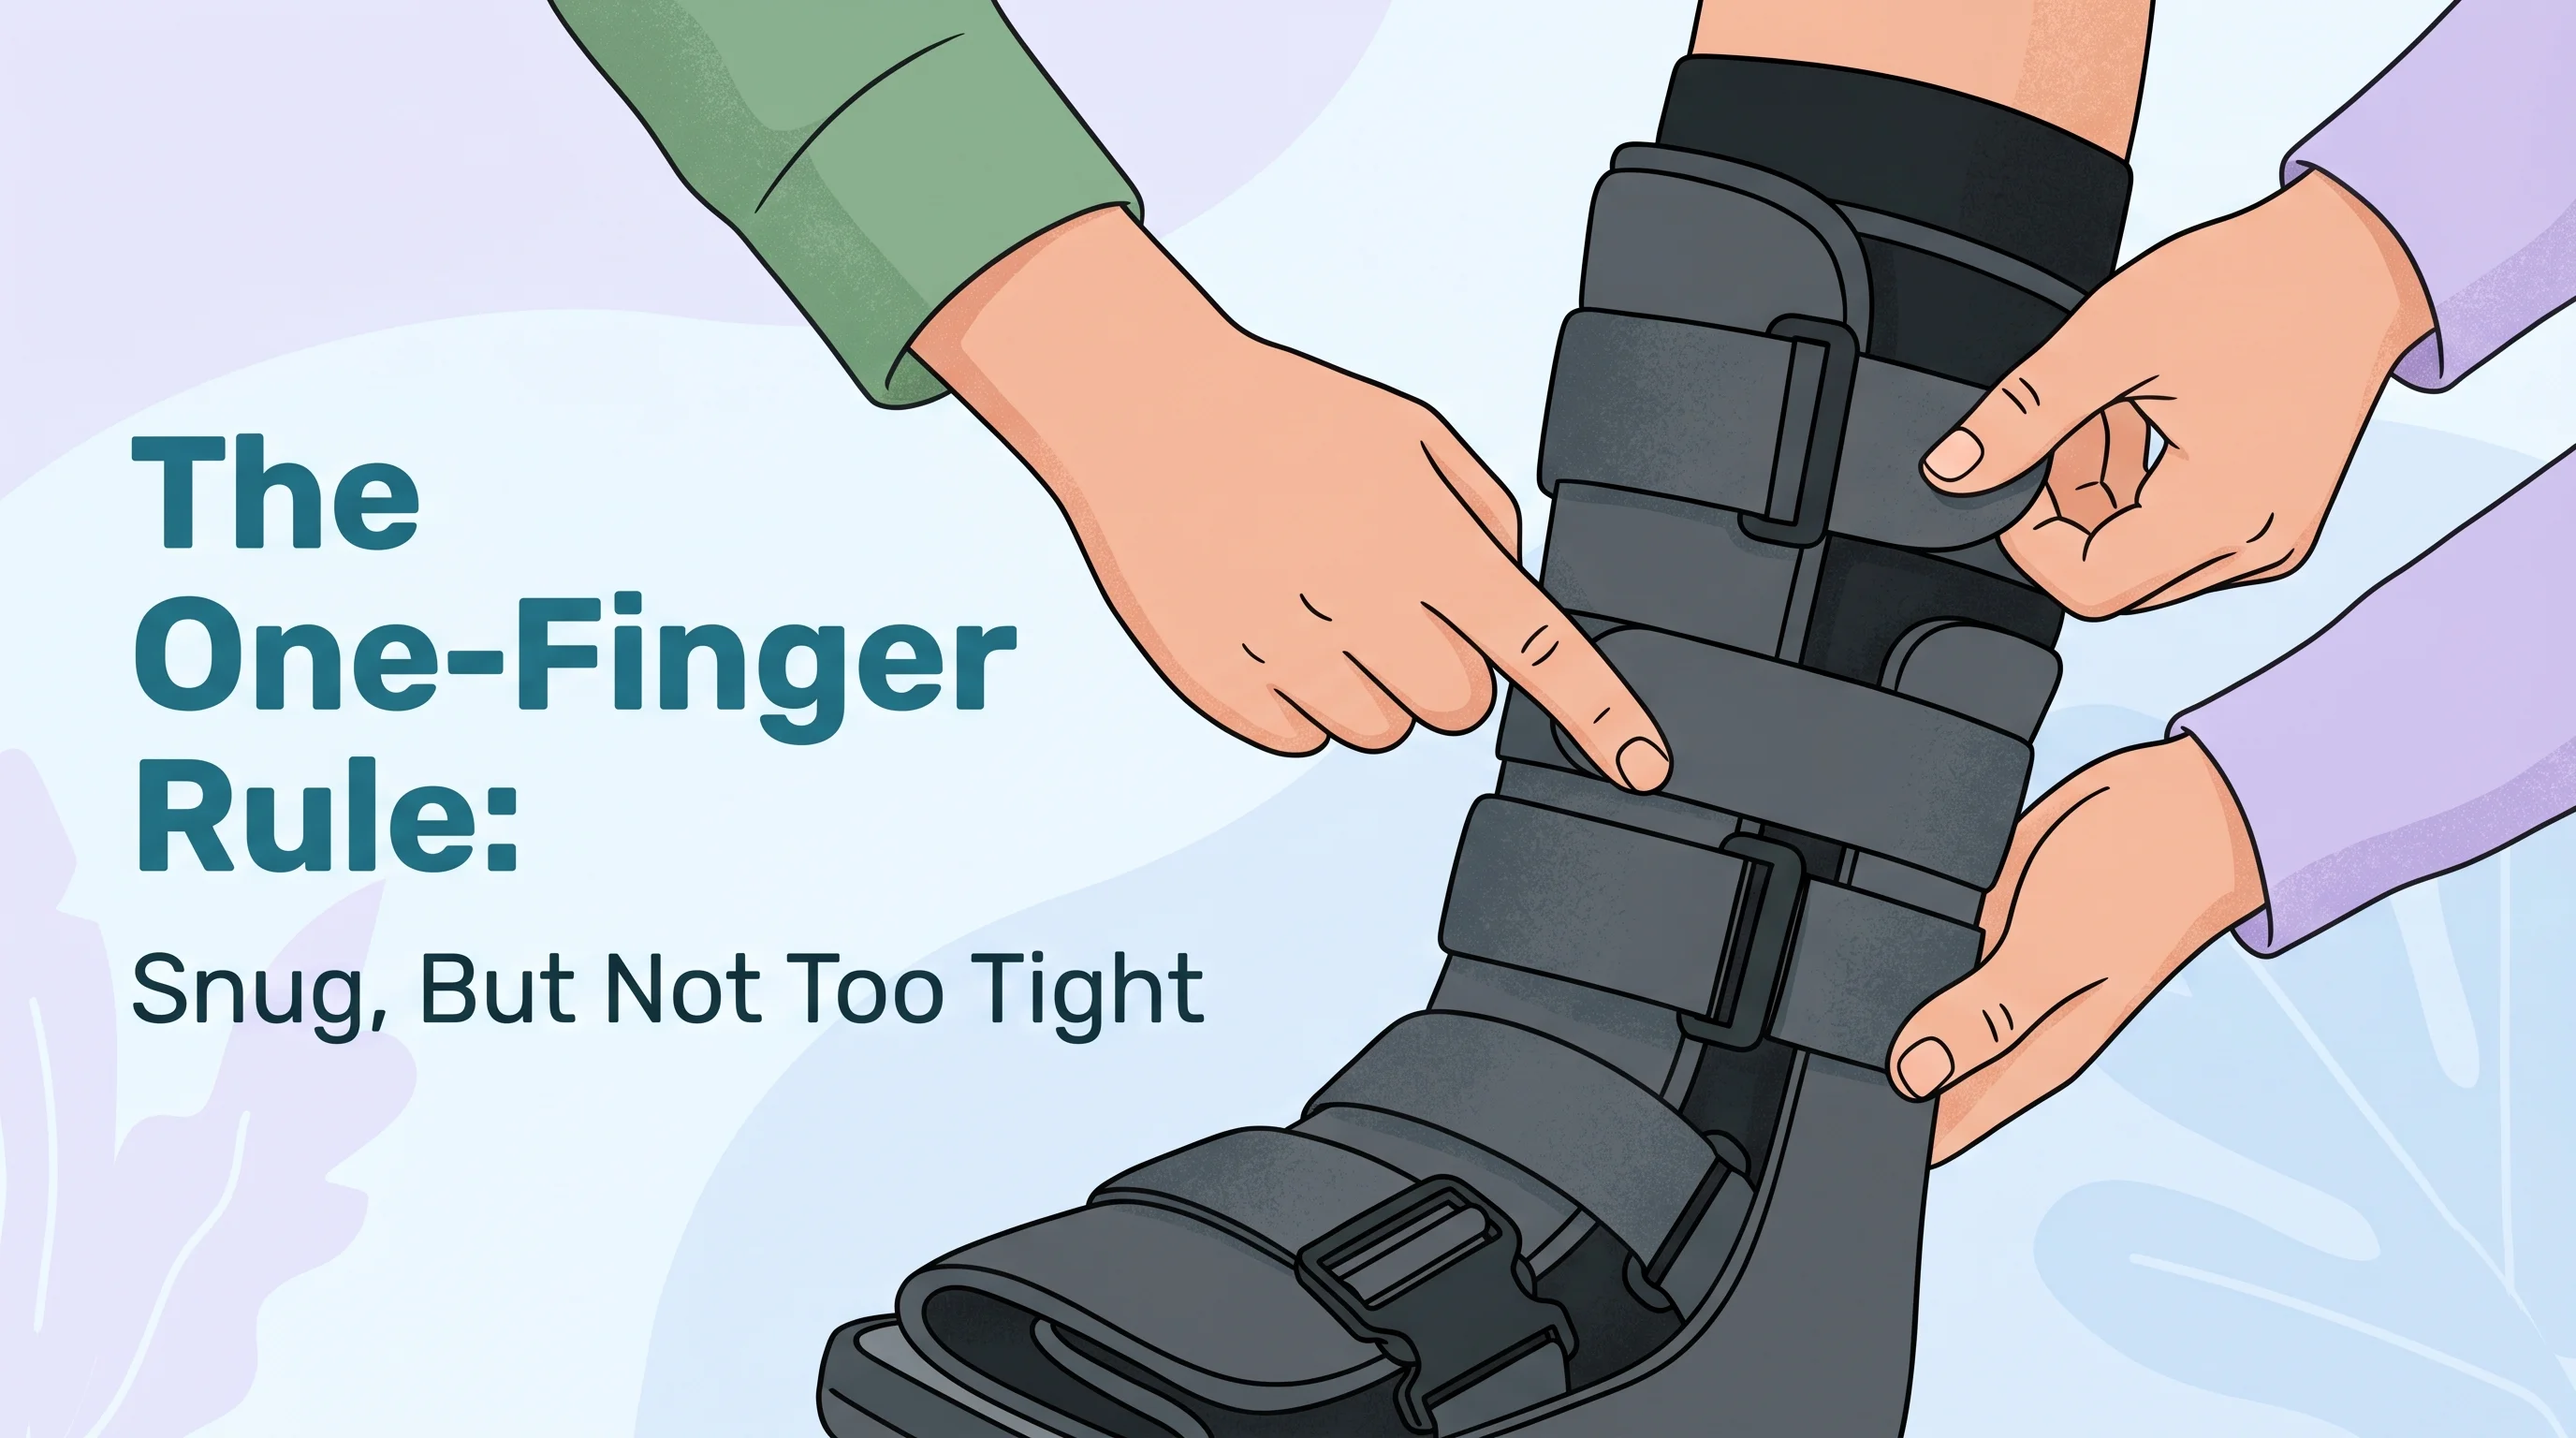
- Target feel: snug, not tight. Use the one-finger rule — slip one finger between the strap and your skin. Two fingers means too loose. Zero means too tight, and too tight leads to pressure sores fast.
- Got an air bladder? Inflate it until the fit feels closer and more stable — then stop. More pressure doesn’t mean more protection.
Before you stand, run this quick check:
- Heel seated at the back? ✓
- No sliding when you flex your ankle? ✓
- No numbness, skin pinching, or throbbing? ✓
Post-surgery with major swelling? The hard shell may not close all the way. That’s your signal, don’t force it. Let the swelling go down first, then lock in.
Step 2: Master the Heel-to-Toe Rolling Technique on Flat Ground
The rocker bottom sole on your orthopaedic boot does more work than you realise, but it only works if you move with it.
Most people shuffle forward in a flat-footed slap. The boot rolls nowhere. The ankle takes nothing. The knee and lower back absorb everything. That’s not a boot problem. That’s a technique problem, and one practice session can fix it.
The Basic Rhythm: What One Step Looks Like
Each step through your booted foot follows a three-part sequence. Slow it down, and you’ll feel every stage.
1. Heel contact — The outer edge of your heel touches down first, about 1–2 cm from the centreline. Your toes stay lifted 10–15° off the ground. Your knee bends 10–20° — it does not lock straight. That bend is your shock absorber. Take it away, and ground impact travels straight to your lumbar spine.
2. Mid-foot roll — Over the next 0.2–0.3 seconds, your weight shifts forward: heel → outer foot edge → mid-arch → ball of foot. Smooth, not sudden. Your pelvis stays level the whole time. One hip dips? The roll has already broken down.
3. Push-off — On your unaffected foot, your toes flex down 20–30° and push off the ground. On your booted foot, the rocker sole handles this for you. Your job: feel the boot’s front edge roll through the ground. Don’t let your foot fold inside the boot.
Target pace for each full step: 0.6–0.8 seconds.
Rocker Bottom vs. Flat Sole: Two Different Jobs
| Flat sole boot | Rocker bottom boot | |
|---|---|---|
| Where rolling comes from | Your ankle + toe flex | The boot’s built-in curve |
| Main technique focus | “Peel” the foot: lift toes, press arch, push off | Let the boot tip forward — feel it roll, don’t force it |
| Common mistake | Flat-footed slapping | Stride gets too long, too fast — pelvis pitches forward |
In a rocker-bottom CAM boot, the arc does the heavy lifting. Your focus shifts to controlling your centre of gravity, so the boot’s momentum doesn’t pull you forward.
Practice Format
Start with 10–15 metre flat stretches, 2–3 laps. Pick one focus point per lap — heel contact, mid-roll, or push-off. Don’t chase all three at once. Keep your stride at 70–80% of your normal length: around 40–55 cm for most adults. A longer stride breaks the roll and pulls you into a forward lean.
Step 3: Use Crutches or a Cane the Right Way (If Prescribed)
Your doctor prescribed assistive devices for a reason. Using them wrong doesn’t make you tougher. It just slows your recovery.
The single most common mistake? Holding the cane on the same side as the boot. That’s backwards. Every major authority — AAOS, Mayo Clinic, Cleveland Clinic — agrees: the cane goes in the hand opposite your injured leg.
The logic is simple. A cane on the opposite side creates a diagonal support triangle. Your cane and your good leg form the base. Your booted leg steps into the protected space. More stability, less load on the injury.
The Three-Point Gait Pattern (Flat Ground)
Get the cane on the correct side first. Then the movement pattern falls into place:
- Move your cane and booted leg forward together — about 20–30 cm. Keep the cane close to your body.
- Swing your good leg through, stepping past the cane and boot, landing in front.
- Repeat. Cane + boot move as a unit. Good leg follows.
Keep your stride short. Stand tall. Resist the urge to lean hard into the cane; a slight sideways tilt is fine. A full trunk dip means something’s off.
Ready to Ditch the Cane?
Your weight-bearing prescription decides that:
- Non-weight bearing (NWB): You need two crutches.
- Partial weight bearing (PWB): Start with two crutches. Move to one cane on the healthy side as your load allowance increases.
- Full weight bearing (FWB): You may not need the cane indoors. Still, keep it for uneven ground, stairs, or slippery surfaces — especially in the early weeks.
Step 4: Use Stairs Safely
Most orthopaedic boot injuries happen on stairs. The rule is dead simple: Your healthy leg leads going up. Your booted leg leads are going down.
Going Up
- Grip the handrail first. Both hands, if you can. One hand on the rail, crutch on the other side if you can’t.
- Step your good leg up to the next stair.
- Bring your booted leg and any assistive device up to meet it.
Don’t let your body surge forward before your feet are planted. Take one step at a time. That’s a step-to pattern. It’s far safer than alternating feet the way you would on a regular day.
Going Down
- Stabilise your grip on the rail.
- Move your booted leg down to the next step first.
- Follow with your good leg.
Crutch users: the crutch goes down with the booted leg, not after.
The One Mistake That Gets People
The rocker sole works great on flat ground. On stairs, it becomes a problem. Don’t roll off the front of the step. Place your full foot flat on the stair surface — heel included. Drive through your heel and leg to move. Push off the ball of your foot near the stair edge, and the boot tips forward. You lose your base fast.
Fix the Height Imbalance: Why Your Back and Hip Hurt and How to Stop It?
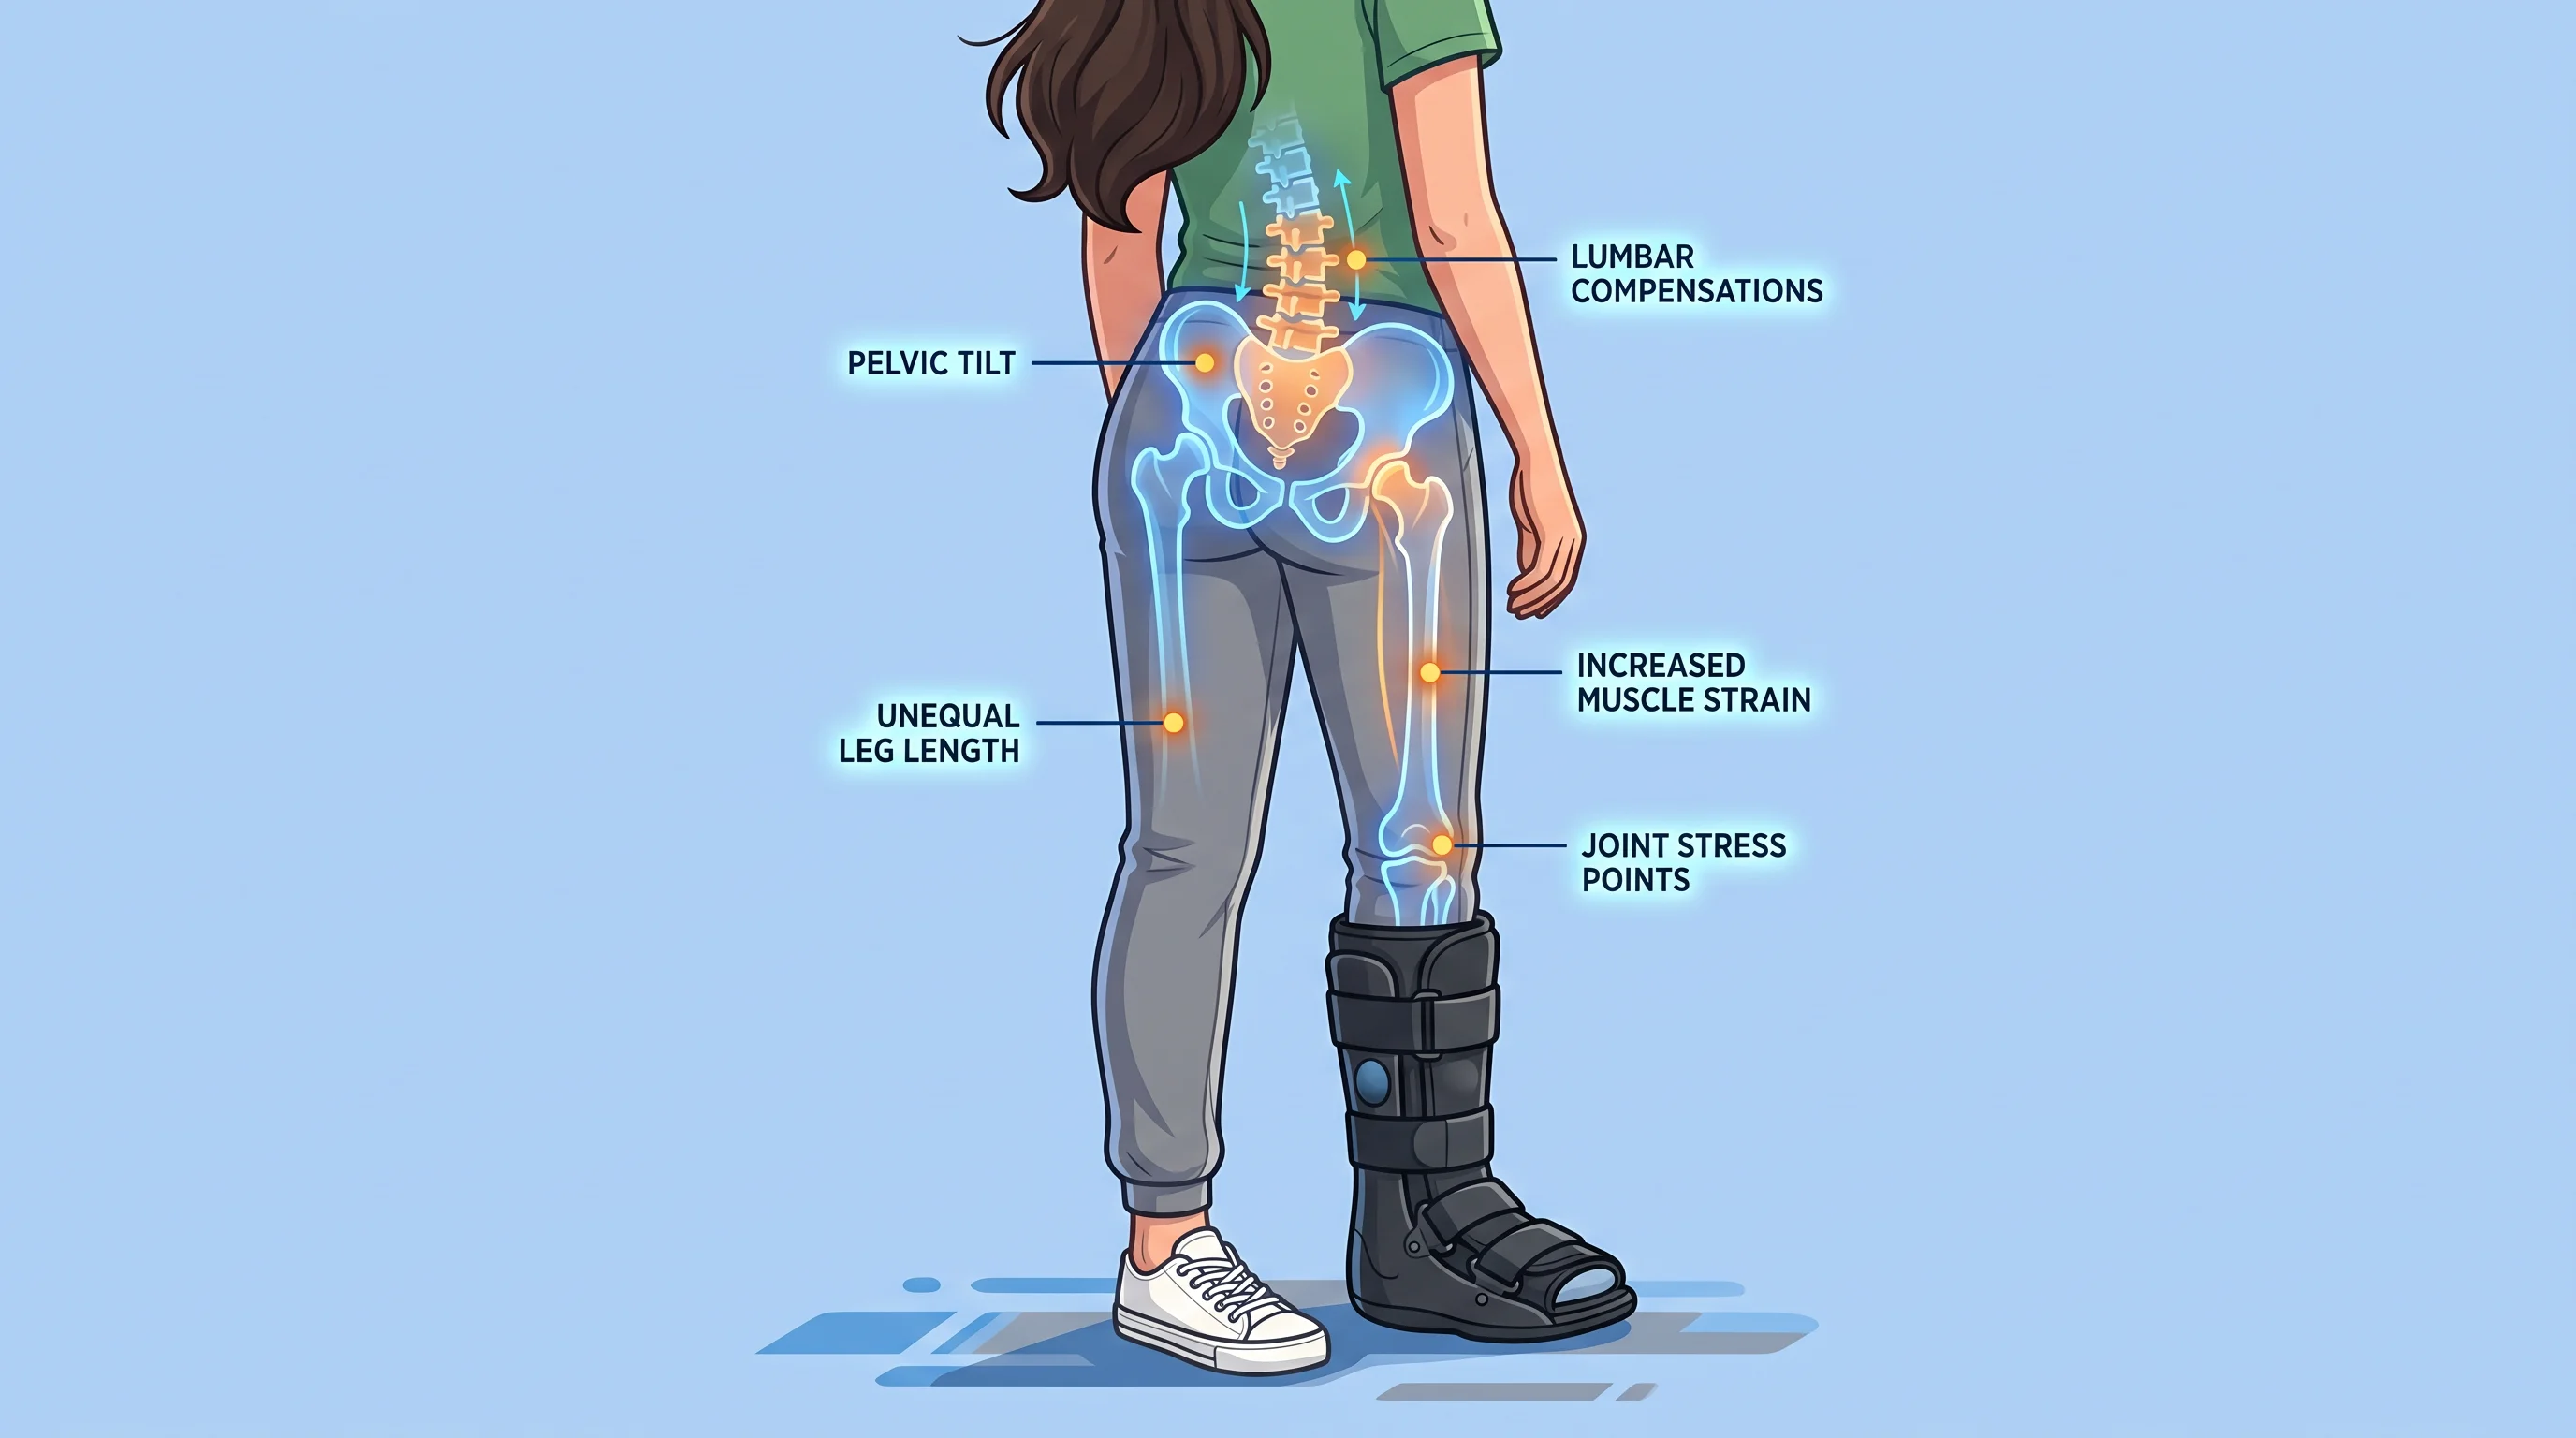
The boot adds height. That’s physics. And your body is paying for it with every step.
A standard CAM walker sits 3–5 cm off the ground at the heel. Your other shoe? Maybe 2–3 cm. That gap tilts your pelvis sideways. It torques your lumbar spine. Then a chain reaction starts, and by the end of the day, your lower back, hip, or knee is sending out distress signals.
The Mirror Test: Check Your Pelvis Right Now
- Put on your orthopaedic boot and your regular shoe
- Stand feet hip-width apart, toes forward, relaxed
- Find your ASIS — the bony points just below your waistband on each side
- Look in the mirror: one side is higher than the other by ~1 cm or more? Your pelvis is already tilting
- Lay a ruler across both points. It angles away from horizontal? That confirms the problem
The Fix: Compensator Shoes and How to Size Them
The solution is simple — raise the healthy-side shoe to match the boot height. But the numbers matter.
Step-by-step sizing:
- Measure your orthopaedic boot’s heel thickness from the floor up — most fall between 3.5–5 cm
- Measure your regular shoe’s heel — usually 2–3 cm
- Calculate the gap: a 4.5 cm boot vs. a 2.5 cm shoe = 2 cm difference
- Start with a 1.5 cm compensator, not the full 2 cm — give your body 2–3 days to adjust
- Still feeling the hip pull? Move up to 2 cm, then reassess
What to look for in the compensating shoe itself:
- Stable heel cup
- Heel height ≥ 2–3 cm
- Rocker-profile sole
After fitting, walk 20–30 steps in a straight line. Still swaying to one side? One foot striking harder than the other? Adjust by ±5 mm and test again.
Troubleshooting: 4 Common Walking Problems and Instant Solutions
Problem 1: Your Foot Slides Inside the Boot
Cause
Your heel is not locked in.
Solution
- Sit down and drive your heel hard into the heel cup.
- Tighten the ankle strap first – snug enough for one finger – then work upward through the remaining straps.
- Walk 10–20 steps. Still sliding? Increase ankle strap tension by 10–15% and test again.
- No moleskin? Use a 3–5 mm foam or gel heel pad, or thicker socks.
Problem 2: Numb or Discoloured Toes
Cause
Straps or air bladder chambers are too tight, compressing blood vessels and nerves.
Solution
Stop walking, sit down, and elevate the foot 10–15 cm above heart level. Release all straps or deflate the air bladder. Check your toes:
- Colour should return toward normal within 2–3 minutes.
- Temperature should feel warmer within 5 minutes.
- Sensation should improve by more than 50% within minutes.
When to call a doctor:
- Capillary refill time longer than 3 seconds
- Persistent pallor, blue‑purple tint, or coldness lasting more than 30 minutes after removing the boot.
Re‑strapping:
Each strap should allow 1–2 fingers of clearance. Air chambers should compress 2–3 mm under light finger pressure – not rock solid.
Problem 3: The Orthopaedic Boot Edge Is Rubbing Your Skin Raw
Cause
Constant rubbing at common pressure points: outer/inner ankle, bony bump at the little toe base (fifth metatarsal head), or where the boot top meets your lower leg. Burning within the first 15–30 minutes of walking is a warning sign.
Solution
Use moleskin or medical tape:
- Clean and dry the skin (wait 1–2 minutes before applying).
- Cut a piece at least 1–1.5 cm larger than the irritated area on all sides. Round every corner (5–8 mm radius arcs) – square corners peel first.
- If a blister has formed but skin is intact, cut a donut shape with a hollow centre slightly larger than the blister.
No moleskin? Layer 2–3 strips of medical tape, overlapping edges. Replace daily.
Problem 4: Swelling Gets Worse After Walking
Cause
Your activity level is outpacing your tissue’s capacity to recover.
Solution
Immediate steps:
- Shorten the walking session.
- Elevate the foot above heart level for 20–30 minutes.
- Apply ice wrapped in a cloth for 15–20 minutes.
If swelling increases within the first 10–15 minutes of walking, reduce session length by 30–40% and rebuild at a slower pace.
How to Transition Out of the Orthopaedic Boot and Walk Normally Again?
Before you start: Your doctor should confirm solid healing (X‑ray, low pain, minimal swelling, symmetrical stride). All four must be met.
Stage 1 (Week 1): Swap into a firm‑soled supportive shoe for three 15‑minute sessions daily. No pain or swelling increase? Extend to 20–30 minutes by day 3–4. Wear the boot the rest of the time.
Stage 2 (Weeks 2–3): Build up to 6–8 hours per day in the supportive shoe. Focus on heel‑to‑toe rolling with every step — this retrains your normal gait.
Stage 3 (Weeks 4–6+): Aim for 6,000–8,000 steps daily without a limp. Before walking faster, pass two tests: 30‑second single‑leg balance on the injured side, and 10–15 single‑leg heel raises with pain under 3/10.
If pain or swelling rebounds (ankle circumference up >1 cm or pain >4/10): cut walking time in half, ice 15–20 min every 2–3 hours, and elevate. After two days of improvement, add back no more than 10–20% volume per week.
FAQ: Quick Answers to the Most-Searched Questions
- Can you walk normally in a walking boot?
Close to normal — but not quite. Most CAM boot prescriptions say “weight-bearing as tolerated.” That means a controlled, shortened stride at about 60–80% of your usual speed. Pain above 4/10? Ankle swelling within 24 hours of a session? You’ve pushed too far. Drop the next day’s walking by 25–50%.
- How long should you wear it daily?
It depends on your injury:
- Moderate ankle sprains: Near full-time for the first three days. Then shift to 5–10 minute walking sessions. Keep total walking under 45–60 minutes per day through week one.
- Stable fractures (weight-bearing approved): Plan for 6–8 weeks total. The first 2–4 weeks call for near-constant wear — boot off for showering only.
- Should you wear it at night?
- Fractures and post-surgery: Yes, at least for the first few weeks.
- Plantar fasciitis: No. A night splint holding 5–10° dorsiflexion does a better job than a full walking boot while you sleep.
- Is a walking boot better than a cast for mobility?
Yes, for most cases. A walking boot lets you bear weight sooner, shower, and check your skin. Casts provide stronger rigid fixation for unstable fractures. Your doctor picks based on fracture stability.
- Is plantar fasciitis technique different from fracture recovery?
Yes, quite different.
Fracture rehab builds your load in stages over several weeks. Plantar fasciitis is the opposite, full weight-bearing from day one is usually fine. The focus is on cutting total walking volume and pairing the boot with regular calf and fascia stretching. Bone stress isn’t the concern here.
Conclusion
Walking in an orthopaedic boot doesn’t come naturally. Your body needs guidance. Most problems — sliding, numbness, rubbing, joint pain, swelling — are preventable with the right fit, heel‑to‑toe rolling, and a height compensator on the other side. Lock your heel in place, protect your skin early, and transition out of the boot in stages. Every correct step supports healing; every poor step works against it. Slow down, stay consistent, and your body will thank you.