
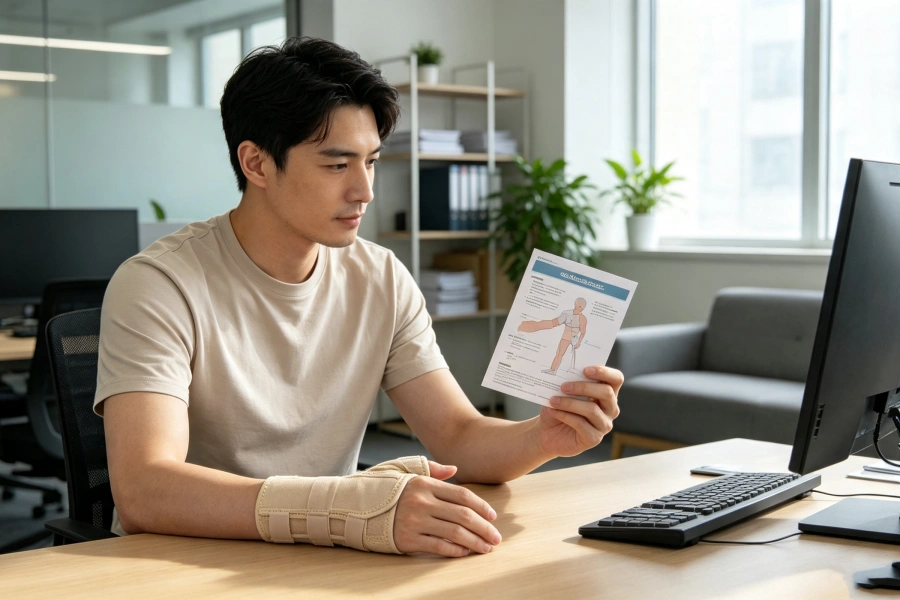
From a jammed finger after last night’s game to a mallet finger that won’t straighten or a trigger finger that’s been locking up for months, dozens of finger braces exist, but few guides tell you which one actually fits your injury. Picking the wrong finger brace wastes money and can delay healing by weeks.
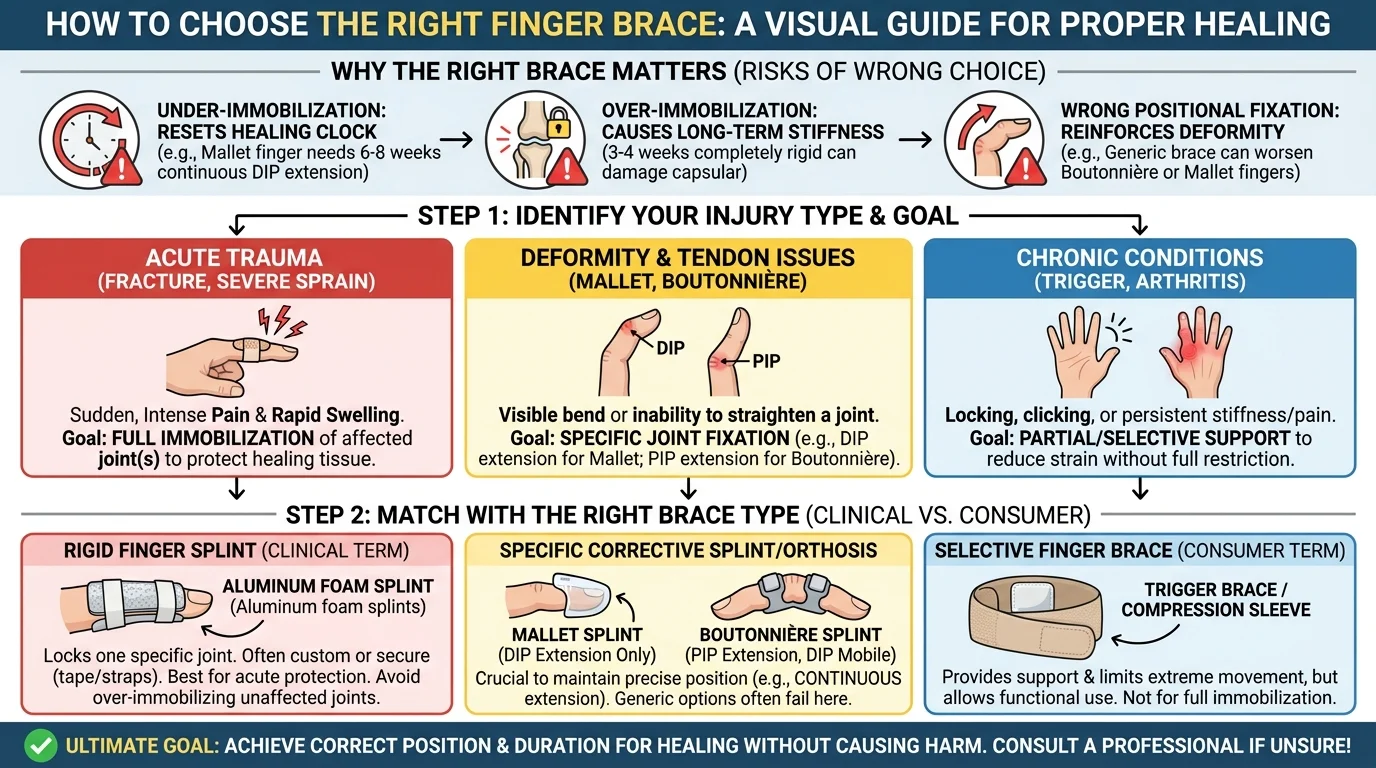
This guide gives you a clear path: identify your injury, match it with the right finger brace, get the fit correct, and avoid common mistakes that slow recovery.
What Is a Finger Brace?
Go to any pharmacy or search online, and you’ll see “finger brace,” “finger splint,” and “finger orthosis” used interchangeably. They don’t.
Here’s the breakdown:
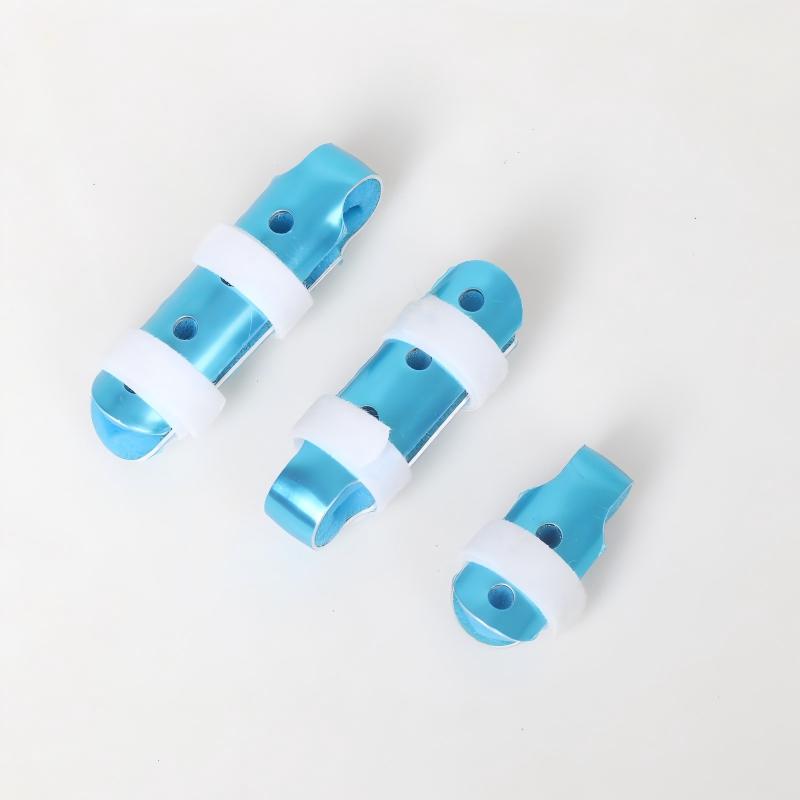
- Finger splint — the clinical term. It’s a rigid or semi-rigid device that locks a specific joint in place. Most are made from aluminum or plastic with foam padding, held on by tape or straps.
- Finger brace — the consumer version. Trigger finger braces and arthritis braces fall into this group. They give partial or selective support, not full immobilization.
- Finger orthosis — the term medical professionals use. It covers the full range: splints, ring splints, dynamic braces, compression sleeves.
Picking the wrong one doesn’t just fail to help. It can damage your recovery in three specific ways:
- Under-immobilization breaks down healing at the cellular level. Mallet finger needs continuous DIP extension for 6–8 straight weeks. One flexion episode tears apart the tendon fibers that are trying to reconnect. Your recovery clock resets entirely.
- Over-immobilization causes a different problem. Just 3–4 weeks of complete immobilization in small finger joints leads to stiffness and capsular tightening. Reversing that can take months of rehab — and in older patients, the damage may be permanent.
- Wrong positional fixation is the most underestimated risk of all. Boutonnière deformity needs PIP extension with DIP mobility. Mallet finger needs the exact opposite joint setup. Put a generic brace on either condition, and you’re not just slowing things down — you’re reinforcing the deformity itself.
Step 1 — Identify Your Injury Type First
Finger injuries fall into four distinct categories. Each one needs a different support strategy.
Category 1: Acute Trauma (Fractures, Dislocations, Severe Sprains)
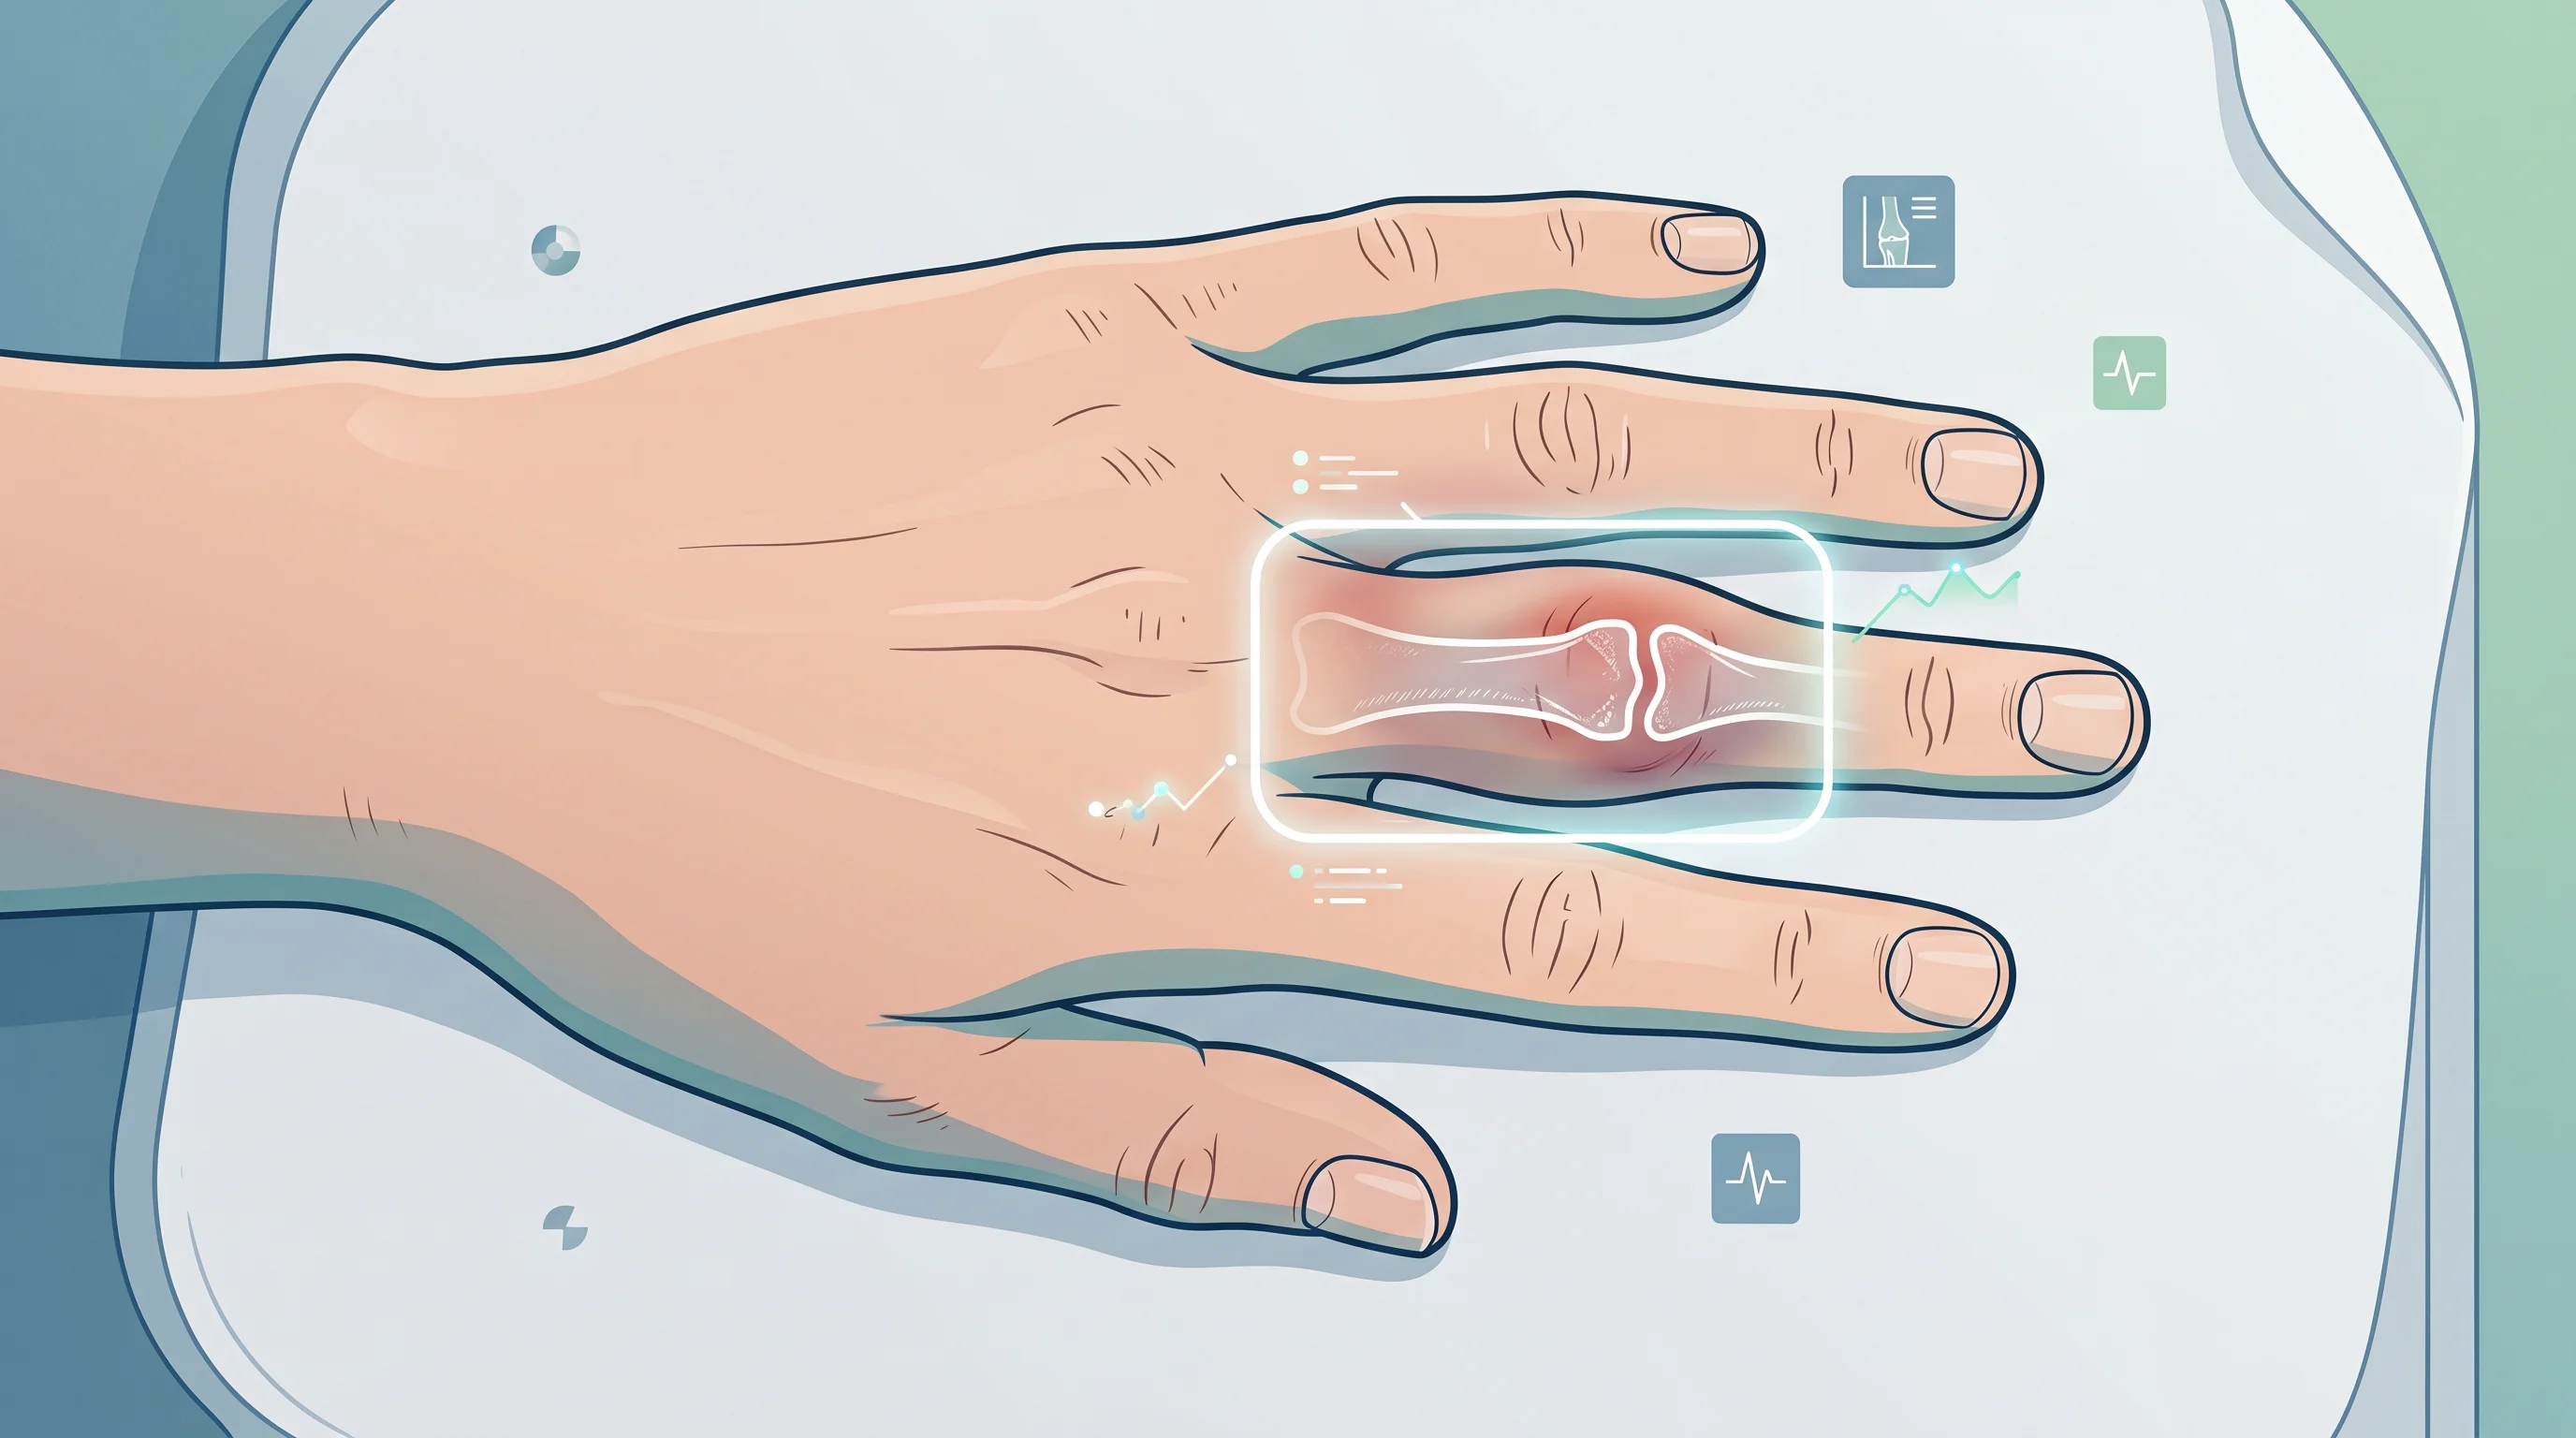
Acute trauma has a clear signature: sudden, intense pain within seconds, followed by rapid swelling. About 70–90% of finger fractures present this exact way. PIP joint dislocations account for 15–20% of all finger sports injuries — far more common than most people expect.
The key question isn’t “how bad is the pain.” It’s whether the shape is wrong.
Look at your finger next to the others. Is there any rotation? Any angular bend? Any shortening? One “yes” means this is not a finger brace situation. Get imaging first.
Category 2: Tendon Injuries (Mallet Finger, Central Slip Rupture)
These injuries are quiet. There’s no dramatic snap. No obvious deformity. Just a finger that refuses to do one specific thing.
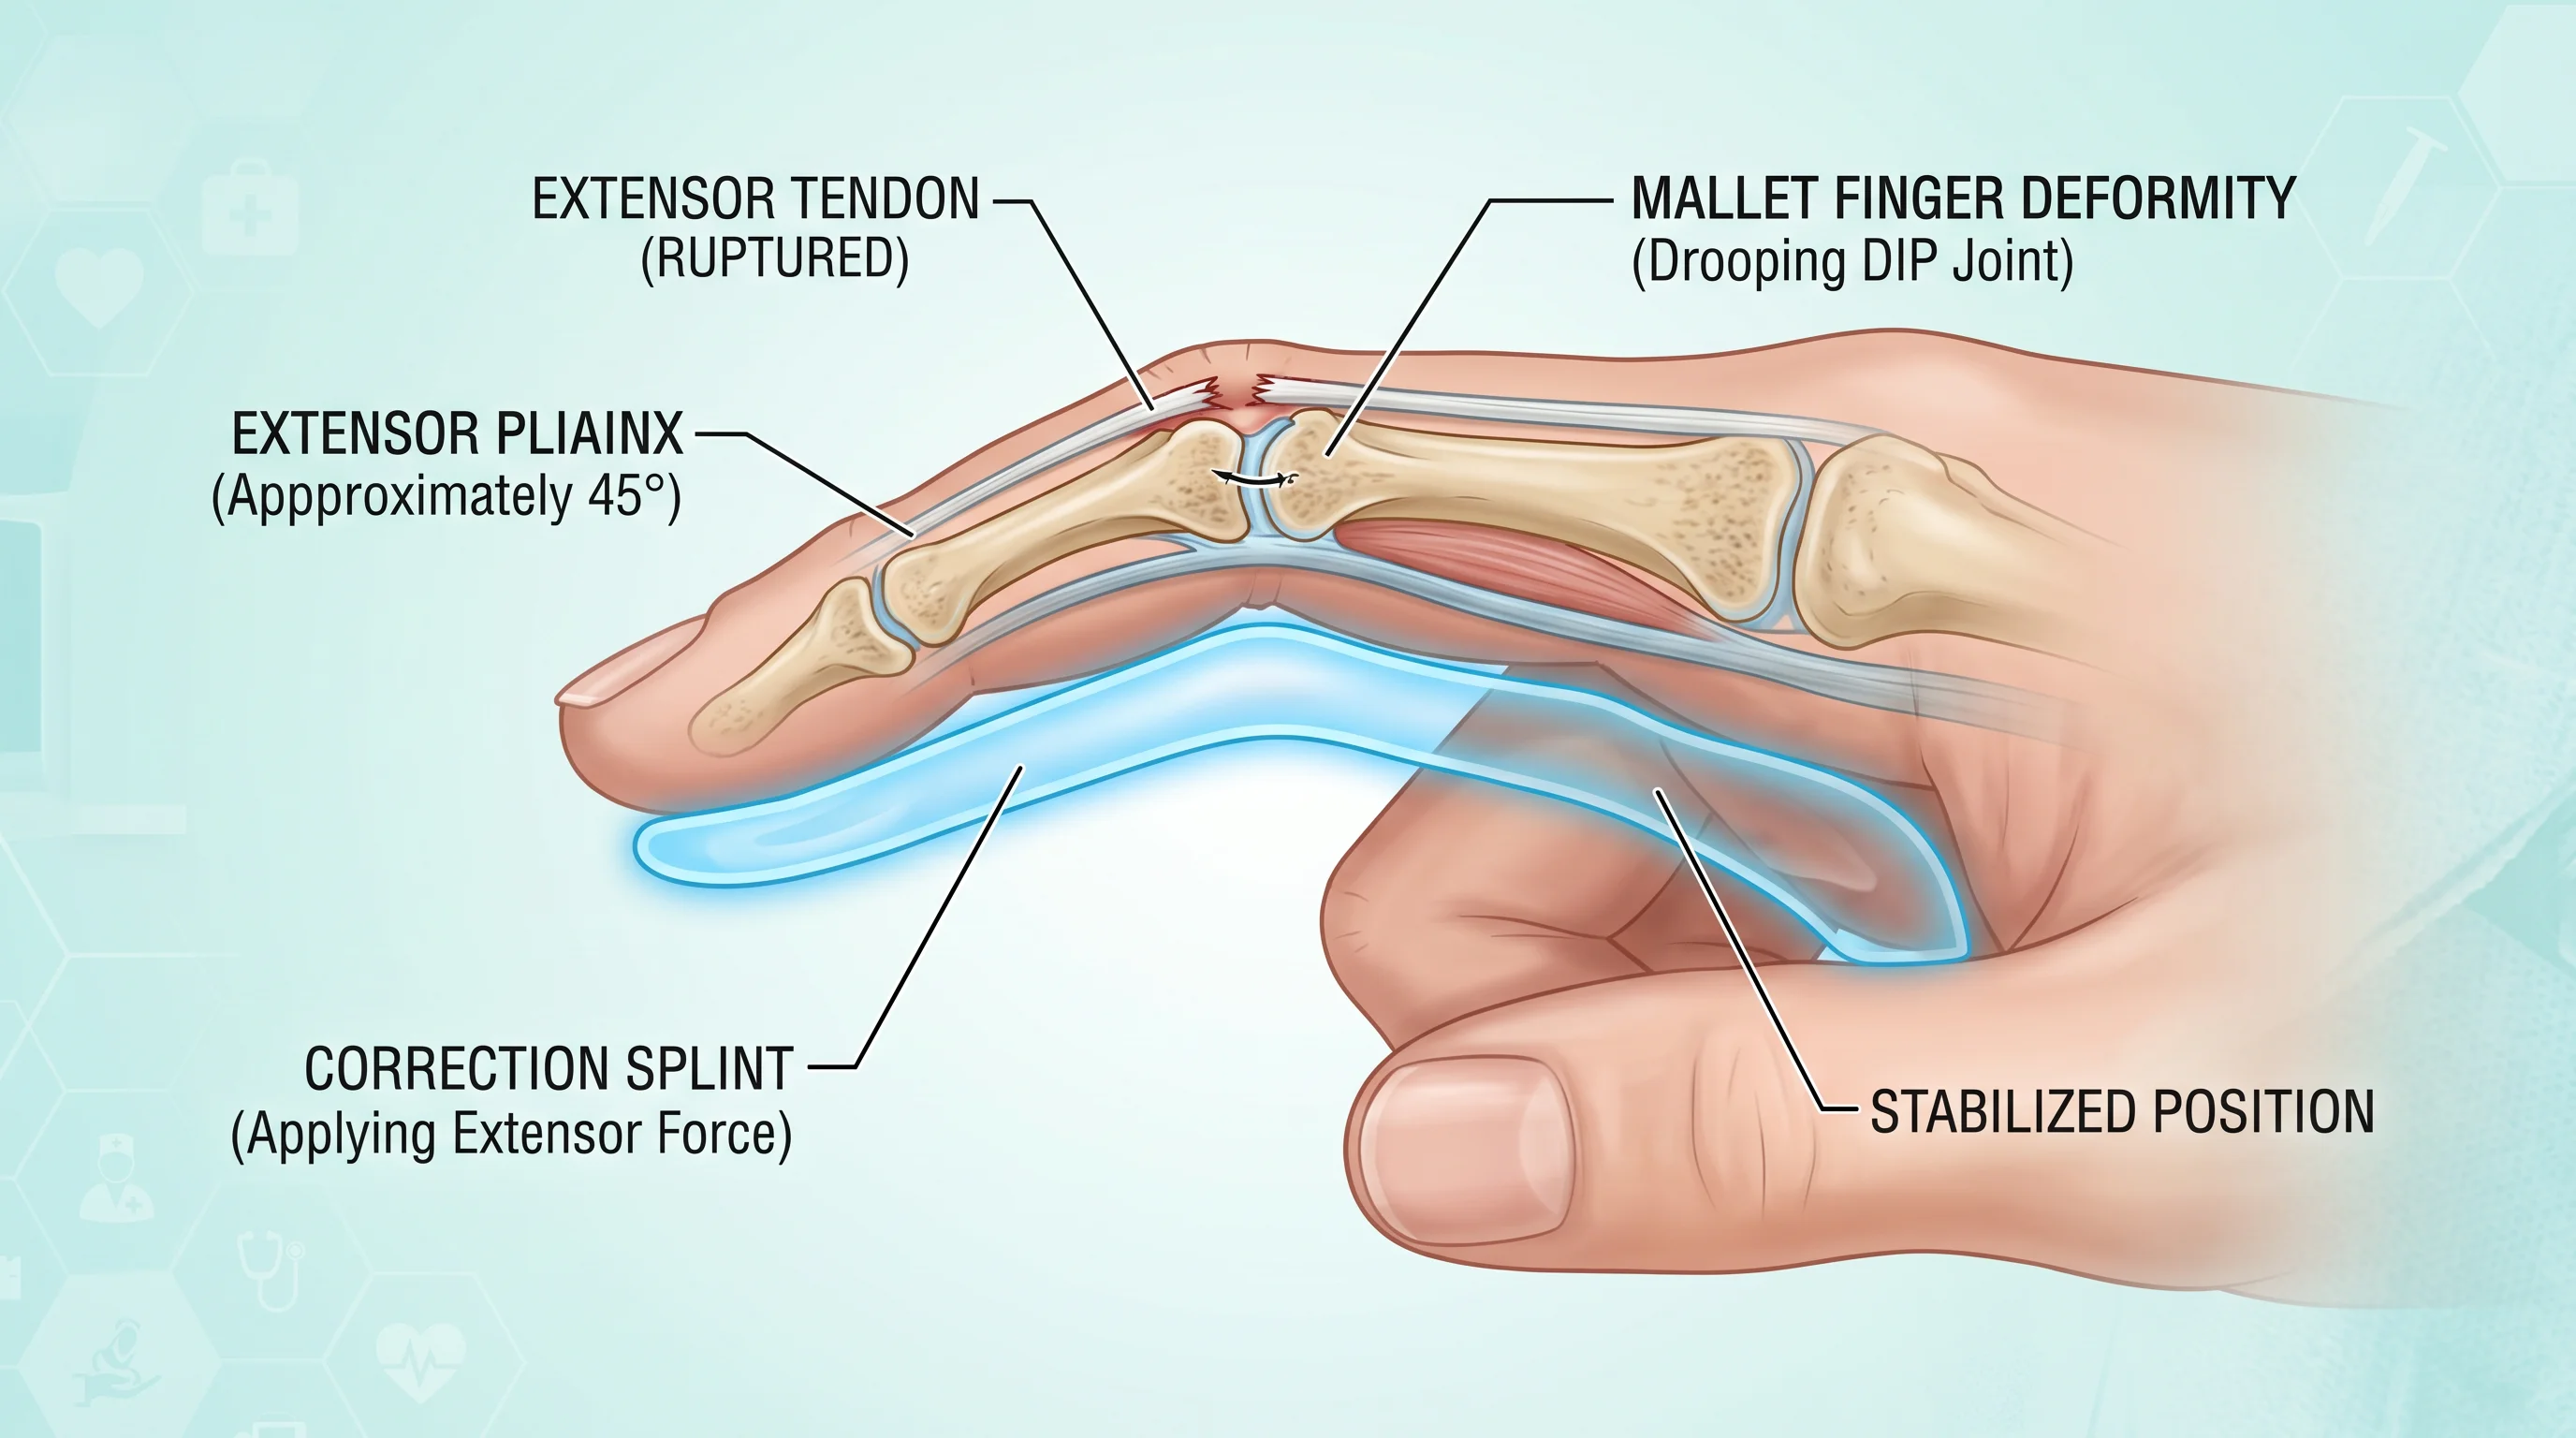
- Mallet finger is the most common missed diagnosis in this group. The tell: your DIP joint droops 20–60° and you can’t straighten it on your own — even though someone else can straighten it for you. That gap between what you can do and what someone else can do is the key clue.
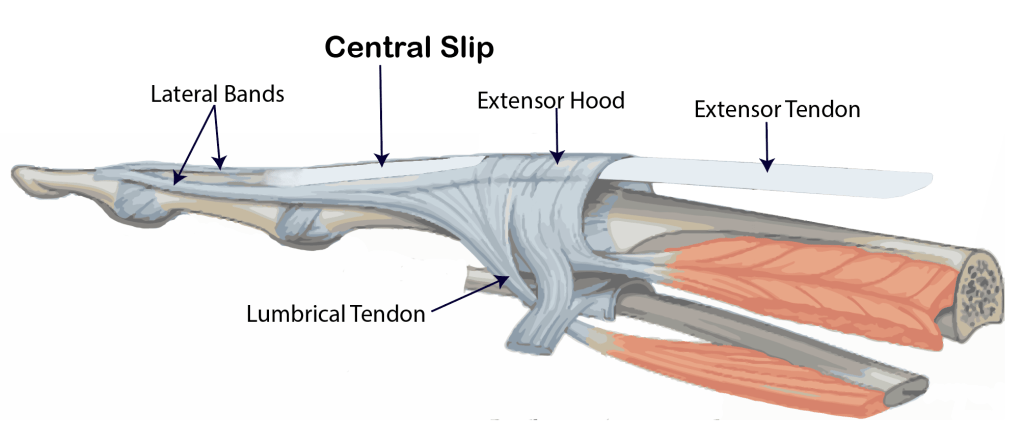
- Central slip rupture gets misread even more often. The early warning is subtle — reduced active extension at the PIP joint, with tenderness right over the dorsal surface. Leave it untreated for 6–8 weeks, and it turns into a boutonnière deformity.
Category 3: Chronic Conditions (Trigger Finger, Arthritis)
- Trigger finger affects 5–20% of hand surgery outpatient cases. Rates are higher in women, people over 40, and diabetic patients. The pattern is predictable: first a clicking sensation, then morning stiffness, then a finger that locks mid-position and needs your other hand to release it.
- Finger joint arthritis follows a different pattern — dull aching that builds over months, stiffness lasting more than 30 minutes after waking, and bony nodules at the DIP or PIP joints (Heberden’s or Bouchard’s nodes). In people over 60, imaging-confirmed hand OA prevalence reaches 60–70%.
Category 4: Sports Protection & Mild Functional Injuries
Not every sore finger is an emergency. Mild sprains with less than 25% reduction in range of motion, low-grade ligament strains, and repetitive-use tendinopathy all fall here. These respond well to protective bracing — but you still need the right protective brace.
Red Flags: When a Finger Brace Is Not the First Answer
Before choosing any finger brace, run through this checklist. One “yes” means seek medical evaluation within 24 hours:
- Visible deformity — angular bend, rotation, or a finger that won’t line up with the others
- Complete inability to flex or extend any joint on your own
- Rapid swelling with skin bruising appearing within 60 minutes of injury
- Numbness, tingling, or burning anywhere in the finger
- Finger turning pale, blue, or cold to the touch
- An open wound deeper than 1 cm, or visible white tissue (bone or tendon)
- Pain was still rated ≥6/10 after 48 hours of RICE treatment
None of these match your situation? You’re ready for the next step: matching your injury type to the correct finger brace.
Step 2 — Match Your Injury to the Right Type of Finger Brace
Five distinct finger brace types exist. Each one handles a specific mechanical job.
Rigid Aluminum or Plastic Finger Splint → Fractures, Severe Sprains, Post-Surgery
This is the full-stop option. Fractures, severe ligament disruption, post-operative fixation — all of these need genuine immobilization.The rigid structure absorbs external force and holds the affected joint dead still. This protects the tissue underneath while the repair process begins. It also crosses two joints on either side of the injury site. That’s what real stability requires.
Stack / Mallet Finger Splint → Mallet Finger (Drooping DIP Joint)
Mallet finger has one non-negotiable demand. The DIP joint must stay in continuous extension — a few degrees of hyperextension — for 4 to 6 weeks straight. The stack splint wraps the fingertip from the palmar side and both lateral surfaces. It covers the DIP joint from all angles. Its entire purpose is to prevent DIP flexion. Do not reduce it. Prevent it.
Trigger Finger Brace → Trigger Finger (Locking, Clicking, Morning Stiffness)
The clinical data are clear. An MCP blocking splint — which limits metacarpophalangeal joint flexion — hits 75% effectiveness in resolving trigger finger symptoms. A DIP splint lands closer to 50%. Most hand therapists start with MCP blocking first. They move to DIP restriction only if the first approach falls short. More restrictive does not mean more effective. The numbers back that up.
Soft Compression Finger Sleeve → Mild Sprains, Arthritis, Sports Protection
Flexible, breathable, and easy to wear all day. The compression sleeve gives you functional comfort and light joint support — not structural stability. It works well for:
- Low-grade sprains with less than 25% range-of-motion loss
- Day-to-day arthritis management
- Sport-specific finger protection
It is not a substitute for rigid fixation. True instability or significant tissue damage needs more than a sleeve. A sleeve will feel better while doing nothing useful for the actual injury.
Adjustable Velcro Finger Brace → Recovery Transition Phase
This one fills a specific window. You’re past the acute stage, but not ready to go without support yet. The adjustable design lets you dial the fit tighter or looser as swelling changes. You can also open the range of motion bit by bit as rehab moves forward. Think of it as a bridge brace — useful in the right context, limited outside of it.
Quick-Match Reference
| Injury | Finger Brace Type |
|---|---|
| Fracture / severe sprain / post-op | Rigid aluminum or plastic finger splint |
| Mallet finger (DIP droop) | Stack / mallet finger splint — continuous DIP extension, 4–6 weeks |
| Trigger finger | Start with MCP blocking splint; escalate to DIP splint if needed |
| Mild sprain / arthritis / sport use | Soft compression finger sleeve |
| Rehabilitation transition | Adjustable Velcro finger brace |
Step 3 — How to Measure Your Finger and Find the Right Size?
What You Need to Measure
Two numbers matter for most finger braces: circumference at the PIP joint (the largest knuckle on most fingers) and finger length if the brace covers the full finger.
How to Measure Circumference (The Step That Matters Most)
Let your hand relax into a slight natural curl — about 10–20° of flex. That relaxed position is how the brace will sit on your finger during use.
With a measuring tape:
1. Place the zero end at the center of your PIP joint on the palm side.
2. Wrap it around the joint in a clean horizontal loop — not angled up or down.
3. The tape should contact skin with firm, even pressure. No visible groove.
4. Read where the tape overlaps. Write it down. Repeat twice and average the three readings.
One critical detail: the tape must circle the joint’s highest point. Don’t let it slide toward the finger base or tip. That highest point is where the brace must pass over to go on your finger.
Finger Length (For Full-Coverage Splints)
Start at the distal palmar crease — the last visible horizontal crease on your palm at the base of that finger. Measure along the underside of the finger to the tip. A typical middle finger runs 75–80mm. Index finger, 68–74mm.
For splints that cover the PIP-to-DIP zone only, also note:
– Palm crease → PIP center (~35mm)
– PIP center → DIP center (~20mm)
Reading the Size Chart
Measure both your finger base and your PIP joint. The two numbers are seldom the same, and that gap determines your size.
| Size | Circumference |
|---|---|
| S | 48–52 mm |
| M | 53–57 mm |
| L | 58–62 mm |
| XL | 63–67 mm |
The target fit: snug contact without pressure marks. You should be able to slide a single sheet of paper between the brace and your skin — nothing more.
Step 4 — Choose Material Based on Wear Duration and Comfort Needs
Rigid Shells: Aluminum vs. Plastic
- Aluminum is stiff. For short-term, high-fixation needs like post-surgical splinting or acute fractures, that rigidity is the whole point. But aluminum has a thermal problem. Pressed against skin for eight hours, bare aluminum goes cold in air conditioning and hot in summer. It’s a reason people stop wearing the brace, and that’s a real recovery risk.
- Engineering plastics — polypropylene, glass-fiber reinforced composites — weigh less than aluminum at the same volume. Past four hours of wear, that weight gap adds up to real fatigue.
The practical rule:
| Daily Wear Duration | Recommended Shell Material |
|---|---|
| < 2–4 hours | Aluminum + thick foam padding (≥5mm) |
| 4–8 hours | Lightweight plastic or carbon composite |
| ≥ 8–12 hours | Engineering plastic/composite + large-area breathable padding |
Padding and Lining: Where Comfort Is Built
Foam (EVA/PU/memory foam): Good at spreading pressure and absorbing shock. The drawback is structural. Most foam is closed-cell, so it has near-zero breathability. After a few hours, moisture builds up, skin softens, and pressure sore risk rises fast.
Neoprene: Solid compression, good warmth at the joint, reliable fit. Also the worst choice for long wear. Past 4–8 hours, full-coverage neoprene traps heat hard — it raises local skin temperature, speeds up sweating, and increases the risk of eczema and skin breakdown. Save neoprene for shorter sessions. For all-day use, look for designs that place neoprene only where reinforcement is needed, with breathable fabric panels covering the rest.
Nylon/spandex knit fabrics: The standard choice for compression sleeves. A typical 80–90% nylon / 10–20% spandex blend gives you 20–30% bidirectional stretch with steady light compression. For all-day wear, keep spandex content at 5–10%. That’s enough for a secure fit without cutting off circulation at bent joints.
Bamboo fiber blends: The moisture absorption rate is higher than that of cotton and polyester. It sits more comfortably against the skin in humid conditions and during long wear.
Step 5 — Match the Finger Brace to Your Daily Usage Scenario
| Scenario | Key Feature | ROM Target | Avoid |
|---|---|---|---|
| All-day / arthritis | Breathable, lightweight, washable | 60–80% | Full rigid immobilization |
| Night / trigger finger | Padded, rigid stay, 0–20° MCP | Near-zero | Thin unpadded splints |
| Sports | Low-profile, sweat-resistant, lateral support | 70–90% | Protruding buckles, thick dorsal bars |
| Office / tools | Low-profile, stop before palmar crease | 60–80% | Rigid crossing distal crease |
How to Wear a Finger Brace the Right Way and Avoid Common Mistakes?
1. Positioning: Where the Brace Sits Matters More Than How Tight It Is
Place the splint on the dorsal (back) side of the finger, centered over the target joint. For PIP joint fixation, the brace needs to cover both the proximal and middle phalanges. Secure each strap on its own bone segment — not across the joint itself.
Length guideline:
– Full-finger splints run from the MCP joint to the fingertip
– If MCP fixation is also needed, extend the splint toward the metacarpal base
One positioning rule that cannot be ignored: treating a mallet finger or extensor tendon injury means the DIP joint must stay in full extension at all times — including during brace changes. One brief bend breaks tendon fiber reconnection. Your recovery clock resets. That’s not a risk worth taking.
Common placement errors to avoid:
1. Straps sitting over bony prominences or joint ridges — this creates pressure pain and skin breakdown, not stability
2. Brace shifted toward the wound or incision site — reposition until the contact sits on stable bone segments on both sides
2. Getting the Tightness Right
The fit should be snug but never compressive. One simple test: slide a single finger under the strap. It should pass through with mild resistance — not slide through with ease.
Signs it’s too tight:
- Fingertip turns white, bluish, or cold
- Numbness or tingling develops within minutes
- Capillary refill test fails
Signs it’s too loose:
- The target joint still moves noticeably during a test
- The brace shifts 5–10mm during normal hand use
3. How Long to Wear It — by Injury Type
| Injury | Typical Duration |
|---|---|
| Mild sprain / contusion | 1–2 weeks |
| Fracture | 4–6 weeks (including sleep) |
| Trigger finger | 6 weeks straight; extend to 10 weeks if symptoms persist |
| Mallet finger | 6–8 weeks — DIP extension maintained throughout |
For fractures and mallet finger, full-time wear includes nighttime.
The Five Mistakes That Slow Recovery
- Brace too tight — circulation cuts off, skin damage starts
- Brace too loose — joint still moving, fixation failing
- Straps over joints or wounds — pain and irritation, not support
- Flexing an extensor tendon injury — even once, even for a second
- Wearing a damp brace — skin breaks down without warning, infection risk climbs
Finger Brace Comparison: Which Type Is Right for You?
| Brace Type | Best For | Support Level | Adjustability | Wear Scenario | Who Should Skip It |
|---|---|---|---|---|---|
| Aluminum Finger Splint | DIP fractures, acute trigger finger | Strong — full extension hold | Moldable aluminum + Velcro straps | First-stage immobilization, sleep, travel | High-volume typists, fine motor work |
| Ring Splint / Trigger Ring | Trigger finger, single-joint instability | Medium — blocks one joint | Sized by joint circumference; keep 2–3 sizes ready | Daytime activity, desk work | Full-finger fractures, severe instability |
| Soft Neoprene Sleeve | Mild sprains, arthritis, chronic stiffness | Light to medium compression | Wide elastic fit, some with Velcro | All-day wear, office, low-load activity | Fractures, injuries needing rigid fixation |
| Plastic Mallet / DIP Splint | Mallet finger, DIP extensor tendon rupture | Strong — DIP locked in extension | Pre-formed; sized by fingertip width | Regular use + sleep, continuous weeks | Injuries above the DIP joint |
| Aluminum Foam U-Splint | Multi-bone fractures, crush injuries | Strong — full wraparound protection | Moldable length and angle | Acute trauma, transport, impact prevention | Arthritis, mild sprains — too bulky |
| Custom Thermoplastic Splint | Complex fractures, post-surgery, deformity | Support level set by your therapist | Therapist-fitted on-site | Clinical rehab, post-op recovery | Self-managed minor injuries |
| Buddy Taping | Stable mild sprains, contusions | Light — borrows support from adjacent finger | Tape width adjustable | Active sports, short-term protection | Tendon injuries, fractures, mallet finger |
FAQ: The Most Common Questions About Finger Braces Answered
- Can I shower with a finger brace on?
Check your finger brace material first. Rigid aluminum splints with adhesive padding need to come off before you shower. Water breaks down the adhesive bond, changes the fit, and shifts the fixation angle.
- Will wearing it long-term stiffen my joint?
Yes — full immobilization over a long period does carry stiffness risk. The better approach is functional fixation. You protect the joint that needs it, while keeping the joints around it moving. Many protocols target just the PIP or MCP joint for this reason. To avoid stiffness building up after you stop wearing the brace, ease back into movement with guided stretching and tendon gliding exercises.
Conclusion
Your recovery starts with the right finger brace. AOFIT combines 15+ years of orthopedic expertise with ergonomic design and medical-grade certifications (CE, FDA, ISO13485)—so you get reliable protection without compromising comfort. Don’t let a wrong choice delay your healing. Visit AOFIT and find the finger brace that fits your injury.