
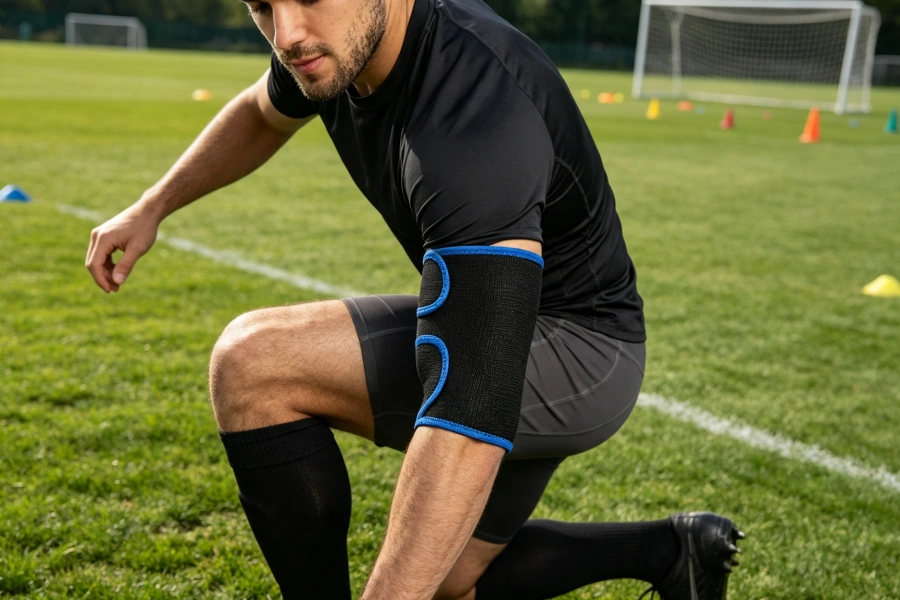
A single awkward fall or hard tackle can sideline you for weeks with an arm or shoulder injury—but the right football arm brace provides crucial support, reduces reinjury risk, and keeps you on the field when your team needs you most.
What Does “Saving Your Season” Really Mean?
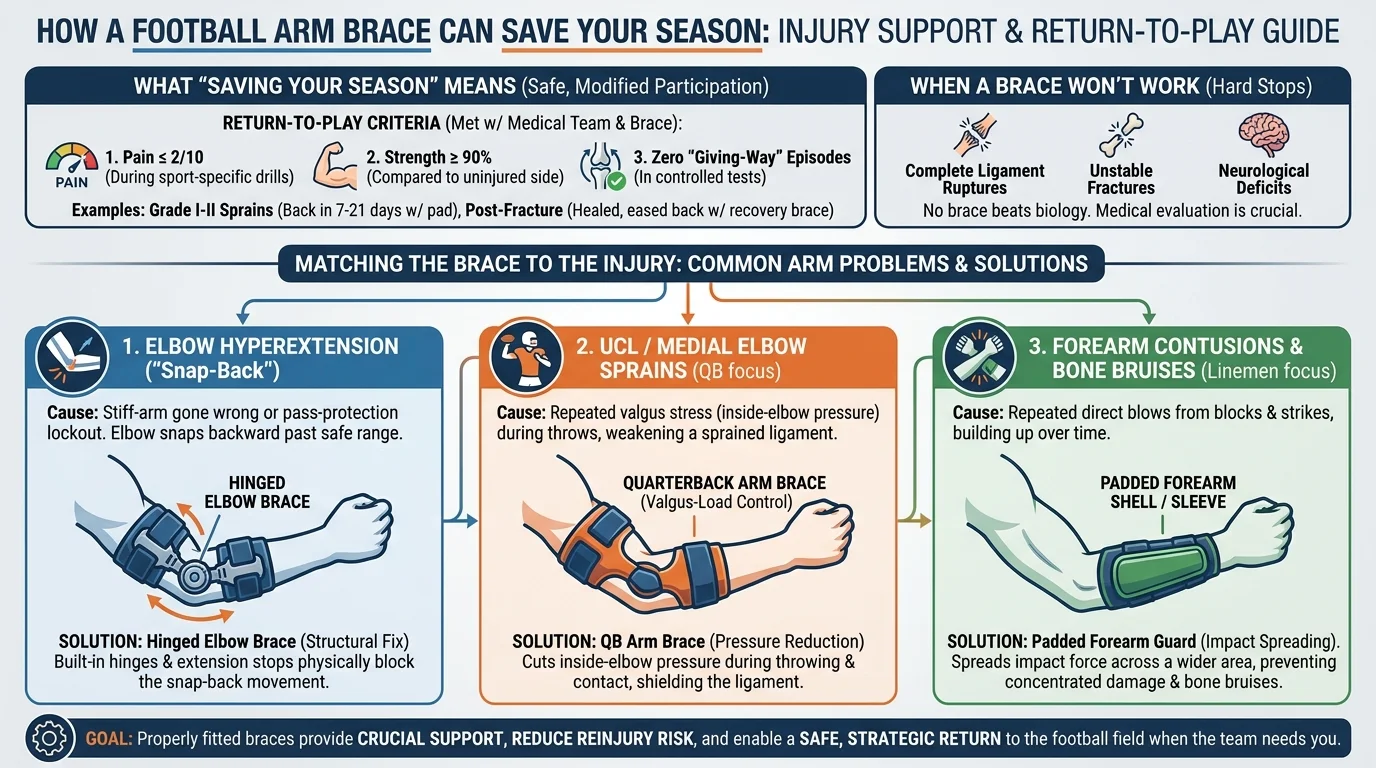
“Saving your season” has a clear medical meaning. It means safe, modified participation while your body heals. Grade I–II sprains? A well-fitted football arm pad support can get you back within 7–21 days. Post-fracture recovery with confirmed bone healing? A football injury recovery brace can ease you back into limited game minutes.
Some injuries are hard stops, though. Complete ligament ruptures, unstable fractures, neurological deficits — these keep you on the bench. No sports arm brace support beats biology.
The real decision comes down to three criteria your medical team checks:
- Pain ≤ 2/10 during sport-specific drills
- ≥90% strength compared to your uninjured side
- Zero giving-way episodes in controlled movement tests
Hit those benchmarks in your football arm stabilizer, and you’re a solid return-to-play candidate.
The 5 Most Common Football Arm Injuries a Brace Addresses
1. Elbow Hyperextension (“Snap-Back” Injuries)
A stiff-arm gone wrong. A pass-protection lockout that collapses under a bull rush. Your elbow snaps backward, and the joint pays the price.
A hinged elbow brace is the direct solution. The built-in side hinges and extension stops block the elbow from snapping past its safe range. The same movement that caused the injury can’t be repeated at full force. For this specific injury, the brace is a structural fix — it changes what the joint can physically do.
2. UCL / Medial Elbow Sprains (For QBs in Particular)
Every throw loads the inside of your elbow with valgus stress. After a UCL sprain, that stress hits a joint that’s already weakened. A quarterback arm brace built for valgus-load control cuts that inside-elbow pressure during throwing and contact. Motion comes back step by step, under medical guidance, without putting the ligament under repeated strain.
3. Forearm Contusions and Bone Bruises
Linemen know this injury better than anyone. Repeated strikes. Block after block. The forearm takes direct blows that build up across a full game — and across a full season.
A padded forearm shell or forearm guard football sleeve doesn’t lock anything down. It spreads impact across a wider area before it can concentrate on one spot. For OL and DL players, this is less about recovery and more about prevention. A minor bruise left unprotected can turn into a bone bruise that pulls you out in Week 9. The pad stops that from happening.
4. Post-Fracture and Post-Surgery Return
This is the most misunderstood use case. A football injury recovery brace used after a fracture or surgical repair isn’t a shortcut back to the field. It’s the last step in a clear progression:
Diagnosis → Swelling control → Rehab → Strength restoration → Physician clearance → Bracing for protected return
Skip the middle steps, and the brace builds false confidence. Follow the full progression, and it becomes the tool that brings you back under a controlled, doctor-supervised plan.
5. Soft-Tissue and Turf-Abrasion Protection
Dives on artificial turf. Tackles that drag your forearm across the ground. Repeated friction strips skin and inflames tissue over a long season.
An arm compression sleeve that football players wear acts as a secondary layer of protection. It cuts friction, holds warmth in the tissue, and manages mild soft-tissue soreness. This is about keeping small problems small before they compound into something that costs you playing time.
The Brace-to-Injury Match (Quick Reference)
| Injury Type | Best Brace Match |
|---|---|
| Elbow hyperextension | Hinged elbow brace with extension stops |
| UCL / medial sprain | Valgus-control elbow brace (QB-specific) |
| Forearm contusions | Padded forearm shell/forearm guard football |
| Post-fracture / post-op | Football injury recovery brace |
| Turf abrasion / soft tissue | Arm compression sleeve football |
Know your injury. Match the tool. That’s where the season gets saved.
Football Arm Brace vs. Forearm Guard vs. Compression Sleeve: Which One Fixes Your Problem?
The Real Difference Comes Down to Function
- A rigid or hinged elbow brace (your true football arm stabilizer) does one thing better than anything else: it controls joint motion. Adjustable extension stops block your elbow from snapping past a safe range. UCL sprains, hyperextension history, post-surgery return — this brace is non-negotiable for all three.
- A forearm guard (the forearm guard football players trust) is built for impact absorption. EVA foam padding — 8–12mm thick for adult players — spreads blunt force across a wider surface before it hits one bone. Got a stable elbow but direct-hit pain over the ulna or olecranon? That’s the situation this guard is made for.
- An arm compression sleeve that football players layer over everything else tackles swelling, circulation issues, muscle fatigue, and turf abrasion. At 15–20 mmHg, it increases venous return and accelerates recovery. But it won’t hold an unstable joint in place. That’s not its job.
The Decision Table
|
Your Problem |
Your Answer |
|
Elbow instability / hyperextension |
Hinged football arm brace + thin compression sleeve underneath |
|
Bone bruise / forearm contusion |
Padded forearm guard football |
|
Swelling, soreness, turf burn |
Arm compression sleeve football |
|
Post-surgery return |
Rigid/hinged brace |
Position-by-Position Breakdown: What Each Player Needs
Quick-Reference: Position-to-Brace Match
| Position | Primary Risk | Right Gear |
|---|---|---|
| QB | UCL / valgus elbow stress | Hinged quarterback arm brace + compression sleeve |
| WR / TE / DB | Forearm strikes, turf burn, wrist sprains | Forearm guard football + low-profile wrist brace |
| RB / FB | Contusions, hyperextension | Padded football arm pad support + hinged stabilizer |
| OL / DL | Repeated high-volume impact | Rigid hinged brace + forearm guard football layered |
| Youth (all) | Growth-plate sensitivity, mobility | Lightweight anatomical guards, soft semi-rigid supports |
Know your position. Know your risk. Then pick the gear that solves your problem — not the one that looked good in a product photo.
How to Choose the Best Football Arm Brace: 6 Features That Matter
Feature 1: Brace Type Matched to Your Injury
| Your Situation | Correct Type |
|---|---|
| Prior hyperextension (OL/DL) | Hinged rigid + outer padding |
| Bone bruise, turf risk (WR/DB) | Padded sleeve + light compression |
| Medial elbow pain, throwing arm (QB) | Low-profile semi-rigid or compression sleeve |
| Youth player post-sprain | Semi-rigid with compliant padding |
Feature 2: Real Compression vs. Just Tight Fabric
Medical-grade compression is 15–30 mmHg, graduated from the forearm toward the bicep. That gradient pushes venous return and cuts swelling. Standard sleeves sold in S/M/L with no mmHg rating? Those are tight fabric. Uniform tension. No real swelling control — and they can pinch at the upper arm while staying loose where it counts.
Three checks before you buy:
1. Does the spec sheet list a specific mmHg range?
2. Does it confirm graduated compression — tighter at the forearm, decreasing toward the bicep?
3. Does the sizing chart use actual circumference measurements, not just generic S/M/L?
All three, yes? You have a real compression product.
Feature 3: Anatomical Contouring That Fits Under Your Pads
Look for a pre-curved elbow zone that matches your arm’s natural 30–45° resting angle. Padding thickness should stay at or below 10–12 mm so it sits flat under shoulder pads. Silicone grippers at the bicep and forearm — or a Y-cut articulated elbow — keep the brace from rotating mid-game as sweat builds up.
Feature 4: Strap System That Stays Put
The right setup has two anchor points:
- Bicep strap (3–5 cm wide): Secures above the mid-bicep. High enough to grip, low enough to stay clear of your shoulder pad edge.
- Forearm strap: Sits just below the elbow on the upper forearm, locking rotation.
Fitting steps that matter:
1. Tighten with your elbow at 30–45° flexion — your football-ready position.
2. Bicep strap first, forearm second.
3. One finger should slide under each strap. Can’t fit one? Loosen it. Circulation problems don’t show up until you’re four plays into a drive.
4. Run 10–15 full flexion/extension reps. Re-check the strap position. Moved? Adjust before the whistle blows.
Feature 5: Breathable Construction Built for 3-Hour Sessions
Skin under football pads hits 30–35°C during a full-pad practice. At that heat, a badly made sleeve turns into a friction blister factory.
The materials that hold up:
- Multi-layer fabric with a moisture-wicking inner (polyester or nylon + 10–20% spandex) and an abrasion-resistant outer
- Mesh panels at the inner arm and above the elbow, where heat builds up most
- Flatlock seams at the bicep and elbow crease — thick seams pressed under pads create hot spots fast
- Antimicrobial treatment (usually silver-based) in higher-end sleeves, useful for back-to-back double sessions
Feature 6: League Compliance
The rule across NFHS, NCAA, and NFL is clear: any hard component — metal hinge, rigid plastic frame, exposed brace edge — must be padded. Most high school and college codes require at least ½ inch (≈1.27 cm) of closed-cell foam over all exposed rigid surfaces. Officials check braces before the game. Visible metal or bare hard edges mean you sit out.
Compliance checklist before game week:
1. Identify every exposed metal or hard plastic part on the brace
2. Does it include factory pad covers for hinges and frame? No? Add ≥½ inch closed-cell foam and tape over every rigid surface
3. Put full pads on — have your equipment manager confirm no hard edge is visible or felt through the jersey
4. Any doubt? Check with game officials at the pre-game equipment inspection
The Correct Way to Wear and Use a Football Arm Brace
Step 1: Measure First — Then Pick Your Size
Grab a soft tape measure. Bend your elbow to about 30° — your natural football stance. Measure the largest part of your upper bicep. Then measure your forearm at its thickest point, 5–10 cm below your elbow crease. Round each number to the nearest 0.5 cm.
Most sizing charts break down like this:
– S: forearm 22–26 cm / bicep 26–30 cm
– M: forearm 26–30 cm / bicep 30–34 cm
– L: forearm 30–34 cm / bicep 34–38 cm
Land between sizes and play a contact position — RB, LB, TE? Go tighter on the forearm fit. Less slippage under a block matters more than comfort in warmups.
Step 2: The Snug-Not-Numb Rule
Tightness has a target. Picture a blood-pressure cuff — firm and purposeful, not cutting anything off. That feeling sits at 7–8 out of 10.
Three signs you’ve gone too far:
- Tingling or numbness in your fingers
- The hand starts changing color
- Deep strap grooves that stay visible more than 10–15 minutes after removing the brace
See any of those? Loosen it right away. Swelling below your brace means circulation is cut off.
Step 3: Position the Brace in the Right Spot on Your Arm
For hinged elbow braces (hyperextension protection, UCL support):
- Hinge center lines up with your elbow joint axis
- Upper cuff: 7–10 cm above the olecranon (back of elbow)
- Lower cuff: 7–10 cm below the olecranon
For counterforce and padded forearm guards:
- Main pad or strap sits ~2 cm below the elbow crease, over the muscle
- Pad pressure on the bone adds pain instead of reducing it
30-second alignment check: Flex to 90°. The brace midpoint should sit at or just below the joint line. Run 10 full flex-extension reps. Brace moves more than 1 cm or pinches at the crease? Reposition it before a single rep in practice.
Step 4: Test Before Game Day
Your football arm stabilizer needs a full practice run before it sees a snap in competition. The testing steps are simple:
QBs: 10–15 full-effort throws — quick game, intermediate, and deep. Watch for changes in release point or a drop in velocity. Brace limiting your mechanics? Something is off with fit or placement.
WR/TE/DB: 10 high-speed catches at varied angles, plus 5–10 blocking simulations. Check that the brace stays within 1–2 cm under repeated contact.
OL/DL: 3–5 full-speed pass set reps and run-fit collisions. The brace should hold its position through extension and contact.
Everyone: 3–5 controlled falls at a jog, landing on the braced arm. Padding must cover your olecranon and epicondyles. No hard edges should hit the turf.
Pain gets worse during these drills compared to no brace? Placement is wrong. Fix it before you call it game-ready.
Step 5: Know When the Brace Is Done
Replace your brace when:
- It rotates more than ¼ turn or slides 2–3 cm during one practice, even with correct tightness
- Padding shows visible cracking, permanent flattening, or bottoming out
- Velcro drops to 50% of its grip
- You’re re-tightening more than once per quarter
- Exposed metal edges, cracked hinges, or loose rivets show up
The Weekly Maintenance Checklist Most Players Skip
| When | What to Check |
|---|---|
| Before each practice | Position alignment, tightness at 7–8/10, no exposed hardware |
| After warm-up on game day | Re-tighten after sweat and pump; athletic staff visual confirm |
| Weekly | Elastic fatigue, padding collapse, Velcro wear, skin reaction |
| End of season | Full replacement eval — don’t carry a degraded brace into next year |
How to Combine a Brace With Recovery to Save Your Season?
- Use the brace as active compression. Medical-grade braces deliver 20–30 mmHg of pressure. That’s enough to control swelling and support blood flow without cutting off circulation. In the first 48–72 hours, wear it most waking hours. Ice for 15–20 minutes every 2–3 hours. Loosen the straps during icing to avoid skin damage.
- Keep moving — protected. Total rest slows strength and balance recovery. For Grade 2 injuries, a semi-rigid football arm stabilizer is the better choice. It allows normal movement but blocks the dangerous end-range positions that cause re-injury. That beats complete rest, every time.
- Layer in rehab each day. Give yourself 10–20 minutes of targeted strengthening on practice days. Start with isometric gripping and wrist holds with the brace on. Move up in load only after pain holds at ≤3/10 and overnight swelling stops rising.
The brace protects the structure. The rehab rebuilds it. Together, both get you through the season.
What’s the Difference Between a Football Arm Brace and a Regular Sports Elbow Brace?
Short answer: A football arm brace is a separate product category built for collision sports. A regular sports elbow brace is not.
| Feature | Football Arm Brace | Regular Sports Elbow Brace |
|---|---|---|
| Impact protection | Rigid uprights + padded shells; tested for repeated tackle/block-level impacts | Minimal — mostly warmth and mild compression |
| Profile under pads | Built to fit under shoulder pads; adds ≤1–1.5 cm circumference | Bulkier hinges and seams; creates pressure points under tight pads |
| Durability | Rated for hundreds of high-energy contacts; high-tensile hook-and-loop closures | Built for everyday use or low-contact sports like tennis |
| ROM control | Adjustable extension stops (e.g., block at 0°, 10°, 20°) | No mechanical stop — compression only |
| League compliance | Many models include factory foam covers meeting ½ inch padding rules | Hard edges often exposed; needs extra taping to be legal |
Conclusion
From preventing aggravation to promoting confident play, a football arm brace isn’t just a piece of gear—it’s your season’s insurance. Don’t let an untreated injury bench you when every game counts. Gear up, protect your arm, and finish the season stronger than you started.
With 19 years of experience in R&D and manufacturing, we specialize in custom sports braces. For reliable protection tailored to your needs, check out our sports brace solutions or visit AOFIT to learn more.