
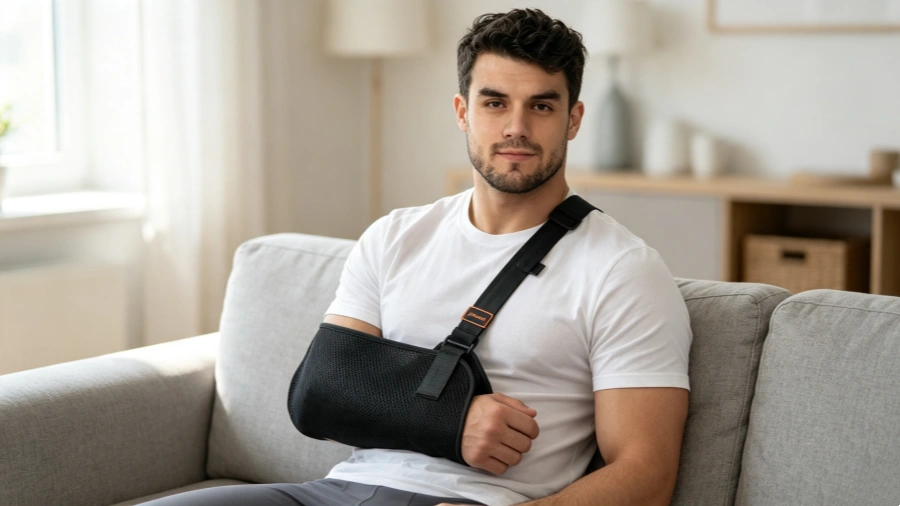
Picking the wrong arm sling doesn’t just cause discomfort — it can slow your recovery or make the injury worse. Most people, even some caregivers, don’t realize there’s a real clinical difference between a high arm sling and a standard broad arm sling. One keeps their hand raised above heart level to reduce swelling. The other holds the shoulder and upper arm steady in a neutral position. Same triangular bandage. Very different purpose.
So whether your doctor handed you a prescription with little explanation, or you’re weighing orthopedic arm sling options before buying, this guide clears things up. It covers the right use cases for each sling, how to apply them correctly, and the common mistakes that send patients back to the clinic.
What Is a High Arm Sling? (Definition + Structure)
A high arm sling (also called an elevation sling) holds the hand and distal forearm above elbow level. That raised position cuts swelling and venous pressure in hand, wrist, and distal forearm injuries.
The structure itself works through a triangular bandage — or a commercial foam-padded sleeve — set up in a specific path:
The apex anchors beneath the injured elbow, forming a pocket
Two ends cross the chest and back, tied at the collarbone on the uninjured side
The front edge reaches all the way to the base of the fingers — no wrist drop, no hand sag
Commercial versions add an adjustable shoulder strap and sometimes a chest stabilizer band. These use breathable nylon-foam laminate with Velcro closures. The result is a deep forearm pouch angled upward — hand near the shoulder, elbow toward the side of the chest.
What Is a Standard Arm Sling? (Definition + Structure)
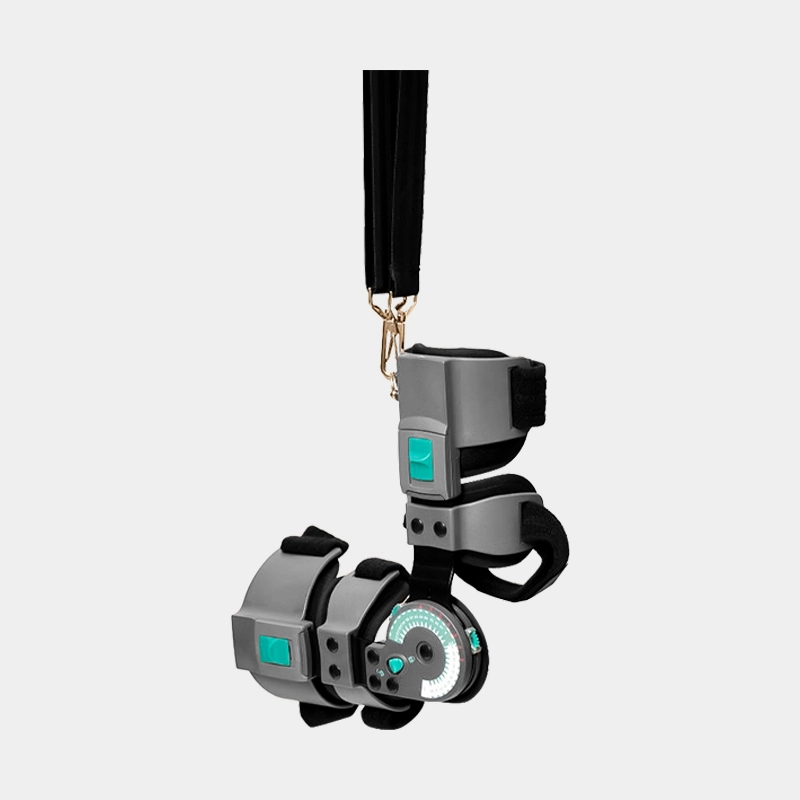
A standard broad arm sling keeps the forearm flat and horizontal. Your hand sits level with — or just above — the elbow. No elevation goal. Just solid, comfortable support for shoulder, upper arm, clavicle, and elbow injuries.
The structure breaks down into three key parts:
Body panel — a triangular bandage or padded fabric cradle that supports the full length of the forearm
Neck strap — the main load-bearing point; it carries the arm’s weight against the torso
Coverage — runs from elbow to fingertips, supporting the upper arm, elbow, forearm, and wrist
One fit detail to get right: the sling must support the arm all the way to the little finger. A shorter fit creates pressure points and throws off weight distribution.
Commercial orthopedic arm slings come with padded neck straps and adjustable Velcro closures. That’s a real comfort upgrade for injuries that need days or weeks of wear.
High Arm Sling vs Standard Sling: Key Differences at a Glance
|
Feature |
High Arm Sling |
Standard Sling |
|---|---|---|
|
Hand position |
10–15 cm above elbow level; typically above heart |
0–5 cm above elbow; level with or just above elbow |
|
Primary therapeutic goal |
Circulation management (edema & bleeding control) |
Mechanical stabilization (offloading & fracture protection) |
|
Best for |
Fingers, hand, wrist, distal forearm, below‑elbow casts/splints |
Shoulder, clavicle, upper arm, elbow, proximal forearm |
|
Typical usage duration |
Acute phase only (first 24–72 hours) |
Days to weeks (1–2 wk mild sprains, 3–4 wk moderate, 6+ wk fractures) |
|
Comfort for long‑term wear |
Lower – shoulder/neck strain, possible numbness |
Higher – padded neck strap, weight spread across torso |
|
Functional restrictions |
Severe (eating, typing, desk tasks difficult); often used intermittently |
Mild – light finger movement, writing, gentle mouse use allowed |
|
Mechanism / effect |
Lowers venous pressure by ~10–20 mmHg, promotes fluid return |
Minimal direct anti‑swelling effect; reduces gravity load on injury |
|
Recovery phase |
Acute (days 1–3) |
Subacute through full healing |
Clinical note: The two are not interchangeable. Best practice often uses both sequentially – start with the high arm sling for the first few days to control swelling, then switch to the standard sling for the weeks of healing that follow.
High Arm Sling: Indications & Clinical Scenarios
The rule is simple: below the elbow injury? The high arm sling is the right call.
Core clinical indications:
Hand, finger, or wrist injuries with acute swelling — crush injuries, sprains, fractures
Distal forearm wounds or injuries where bleeding control is a priority
Hand or finger infections with visible swelling below the elbow
Post-trauma first aid — use a triangular bandage elevation sling as the fastest available option
Position matters. Fingertips rest on the opposite shoulder. The forearm angles across the chest. The hand must sit clearly above the elbow. If it doesn’t, the sling isn’t working.
One care point most patients miss — move the arm gently every hour if your clinician allows it. NHS guidance is clear on this: short, periodic movement reduces stiffness during the acute phase. It won’t affect the elevation doing its job.
Standard Arm Sling: Indications & Clinical Scenarios
Your doctor reaches for this sling when the injury sits at the shoulder, clavicle, upper arm, or elbow. The goal is stabilization and weight offloading — not elevation. Here’s what clinical protocols call for.
Core Clinical Indications
Shoulder and clavicle injuries:
Shoulder dislocation post-reduction — applied right after closed reduction to support arm weight and limit movement. Doctors often combine it with a swathe for added rotational control
Clavicle mid-shaft fractures — the broad arm sling is first-line here, and the data backs it up.
AC joint separation (Grades I–II) — typical wear time is 7–14 days for pain relief and relative rest
Rotator cuff strains, shoulder contusions, post-arthroscopic procedures — short-term use, ≤1–2 weeks, before moving to active movement
Elbow and forearm injuries:
Nondisplaced radial head or stable elbow fractures after splinting
Forearm fractures (radius/ulna), once a cast or splint is applied
Proximal and mid-shaft humerus fractures after splinting
How Long Should You Wear It?
Wear time depends on injury severity:
|
Injury Type |
Typical Duration |
|---|---|
|
Soft-tissue shoulder injury |
1–2 weeks |
|
AC joint separation (I–II) |
7–14 days |
|
Clavicle mid-shaft fracture |
Until pain allows, 6–8 weeks healing total |
|
Elbow/forearm fracture post-cast |
Until pain ≤2–3/10 unsupported |
Around weeks 2–3, full-time sling use for shoulder injuries should start winding down. Wearing it too long risks joint stiffness. Move to part-time wear once rest pain drops to VAS ≤2–3/10.
A Standard Sling Alone Isn’t Always Enough
A broad arm sling handles most situations — but not all.
Add a swathe or shoulder immobilizer to restrict internal or external rotation. That applies to certain shoulder dislocations and post-operative rotator cuff repairs.
Pros and Cons: High Arm Sling vs Standard Arm Sling
|
High Arm Sling |
Standard Arm Sling | |
|---|---|---|
|
Elevation strength |
✅ Strong — hand near opposite shoulder |
❌ Weak — hand just above elbow |
|
Injury fit |
Fingers, hand, wrist, distal forearm |
Shoulder, clavicle, upper arm, elbow |
|
Edema control |
✅ First-line choice |
❌ Insufficient for acute distal swelling |
|
Long-term wearability |
❌ Uncomfortable beyond hours |
✅ Designed for weeks of wear |
|
Self-management ease |
❌ Needs guidance to maintain position |
✅ Simple one-strap adjustment |
|
Proximal injuries |
❌ Can worsen pain or alignment |
✅ Correct clinical choice |
|
Stiffness risk |
⚠️ Higher — breaks needed every hour |
⚠️ Lower — but still needs periodic movement |
The takeaway is simple: neither sling is better across the board. The high arm sling wins the acute swelling battle. The standard forearm sling wins the long recovery war. In many cases, the right protocol uses both — elevation sling first, broad arm sling second.
How to Wear Each Type the Right Way: Step-by-Step Application Tips
Applying a High Arm Sling
1. Fold the triangular bandage
Fold point to base. Then fold again into a broad band about 7–10 cm wide.
2. Position the arm
Flex the elbow to 90°–120°. Bring the hand up toward the opposite shoulder — that’s the elevation target. Hand near the collarbone. Not halfway up. Near the shoulder.
3. Place the forearm across the chest
The forearm runs at an angle across the chest. The hand sits at or just below the opposite shoulder. Keep fingertips exposed — you need to check color, warmth, and movement.
4. Apply the lower band
Center the cravat under the wrist, about 2–3 cm above the wrist crease. Bring both ends up and tie at the side of the neck on the uninjured side using a reef knot. Never tie over the spine.
5. Secure the upper arm
Use a second folded bandage. Center it over the mid-humerus. Bring the ends around the back and tie on the opposite side of the chest.
6. Check the fit
Leave one to two finger-breadths between the neck strap and skin. The elbow sits at or just above waist level. The hand sits higher than the elbow. Recheck circulation every 1–2 hours during the first 24 hours.
Applying a Standard Broad Arm Sling
1. Set the elbow angle
Bend to 90°–100°. Below 70° loses support. Above 120° strains the shoulder.
2. Position the bandage
Place the triangular bandage under the forearm. Point it toward the elbow. The long edge runs from wrist to elbow beneath the arm.
3. Check forearm level
The forearm should run close to parallel with the ground, or with the hand up to 10–15° higher than the elbow. The elbow must sit deep in the sling pocket. Not at the edge. Deep in.
4. Cover the wrist
Sling material extends to the base of the fingers. Keep fingertips exposed. The wrist joint is covered.
5. Tie the neck strap
Bring both ends up and tie just above the clavicle on the uninjured side. The hand should sit at or just above elbow level.
6. Secure the elbow end
Fold the extra fabric at the elbow and pin or tape it down. No hard ridges pressing into the olecranon.
Universal Tips for Both Sling Types
Daily skin checks: Remove the sling once per day if the treatment plan allows. Look for redness lasting more than 30 minutes, blistering, or skin breakdown at the neck, elbow, and wrist contact points. Add 0.5–1 cm foam or gauze padding under pressure points before refitting.
Sleeping in a sling: Most post-surgical and acute injury protocols call for wearing the sling at night for the first 1–2 weeks. Back sleeping — support the forearm and elbow with one or two pillows to keep the same alignment as upright. Side sleeping — place a firm pillow in front of the body to rest the arm on. Never sleep on the injured side. Check strap tension every morning — straps loosen overnight.
Micro-breaks: Take the sling off 3–4 times per day for 5–10 minutes. This cuts down on stiffness and keeps swelling under control — unless your care team has prescribed full-time immobilization. Rest the arm on a pillow or your lap during those breaks. Never let it hang unsupported.
New symptoms after refitting: Sudden numbness, tingling, or a color change in the fingers — loosen the sling right away and recheck. Symptoms not clearing within a few minutes? Contact your care team.
FAQ: High Arm Sling vs Standard Sling — Quick Answers
Q: Are there sling types beyond the high arm sling and the standard sling?
A: Yes. Here are three additional sling types designed for specific conditions:
Shoulder immobilizers – hold the entire shoulder joint in place. Ideal for rotator cuff repairs and post‑surgery shoulder dislocations.
Collar and cuff slings – support the forearm with a simple neck loop. Best for clavicle or proximal humerus fractures.
Figure‑of‑eight clavicle braces – stabilize collarbone fractures by pulling the shoulders back.
Each type targets a different injury. Visit aofitbrace.com to match your diagnosis to the right product.
Conclusion
Picking between a high arm sling and a standard arm sling isn’t about personal preference. It’s a clinical decision that shapes how well — and how fast — you recover.
Now you know the difference. The next step is putting it to use. Browse AOFit‘s orthopedic arm sling collection to find an option built for your specific injury. The right support isn’t just about comfort. It’s what real recovery is built on.