
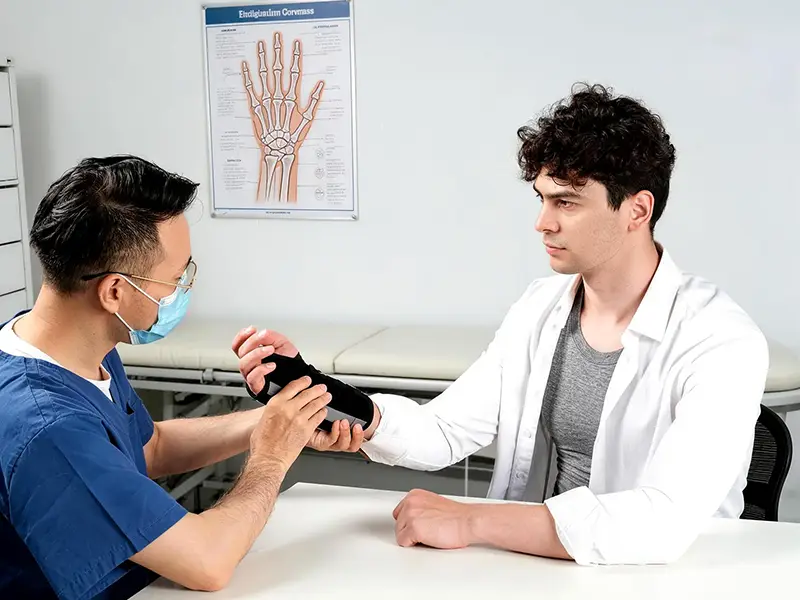
That sudden pop. The sharp ache. The way you pull your wrist tight to your chest without thinking, a sprained wrist turns even simple tasks into a struggle.
It might have happened mid-workout, during a fall, or from a bad twist. Either way, the question is almost always the same: do I need a wrist support brace for sprain, or will it heal on its own?
The answer goes beyond how much it hurts right now. Three things shape your recovery path:
Sprain severity — how badly the ligament is stretched or torn
Ligament involvement — which structures took the impact
Your activity level — what your wrist needs to handle each day
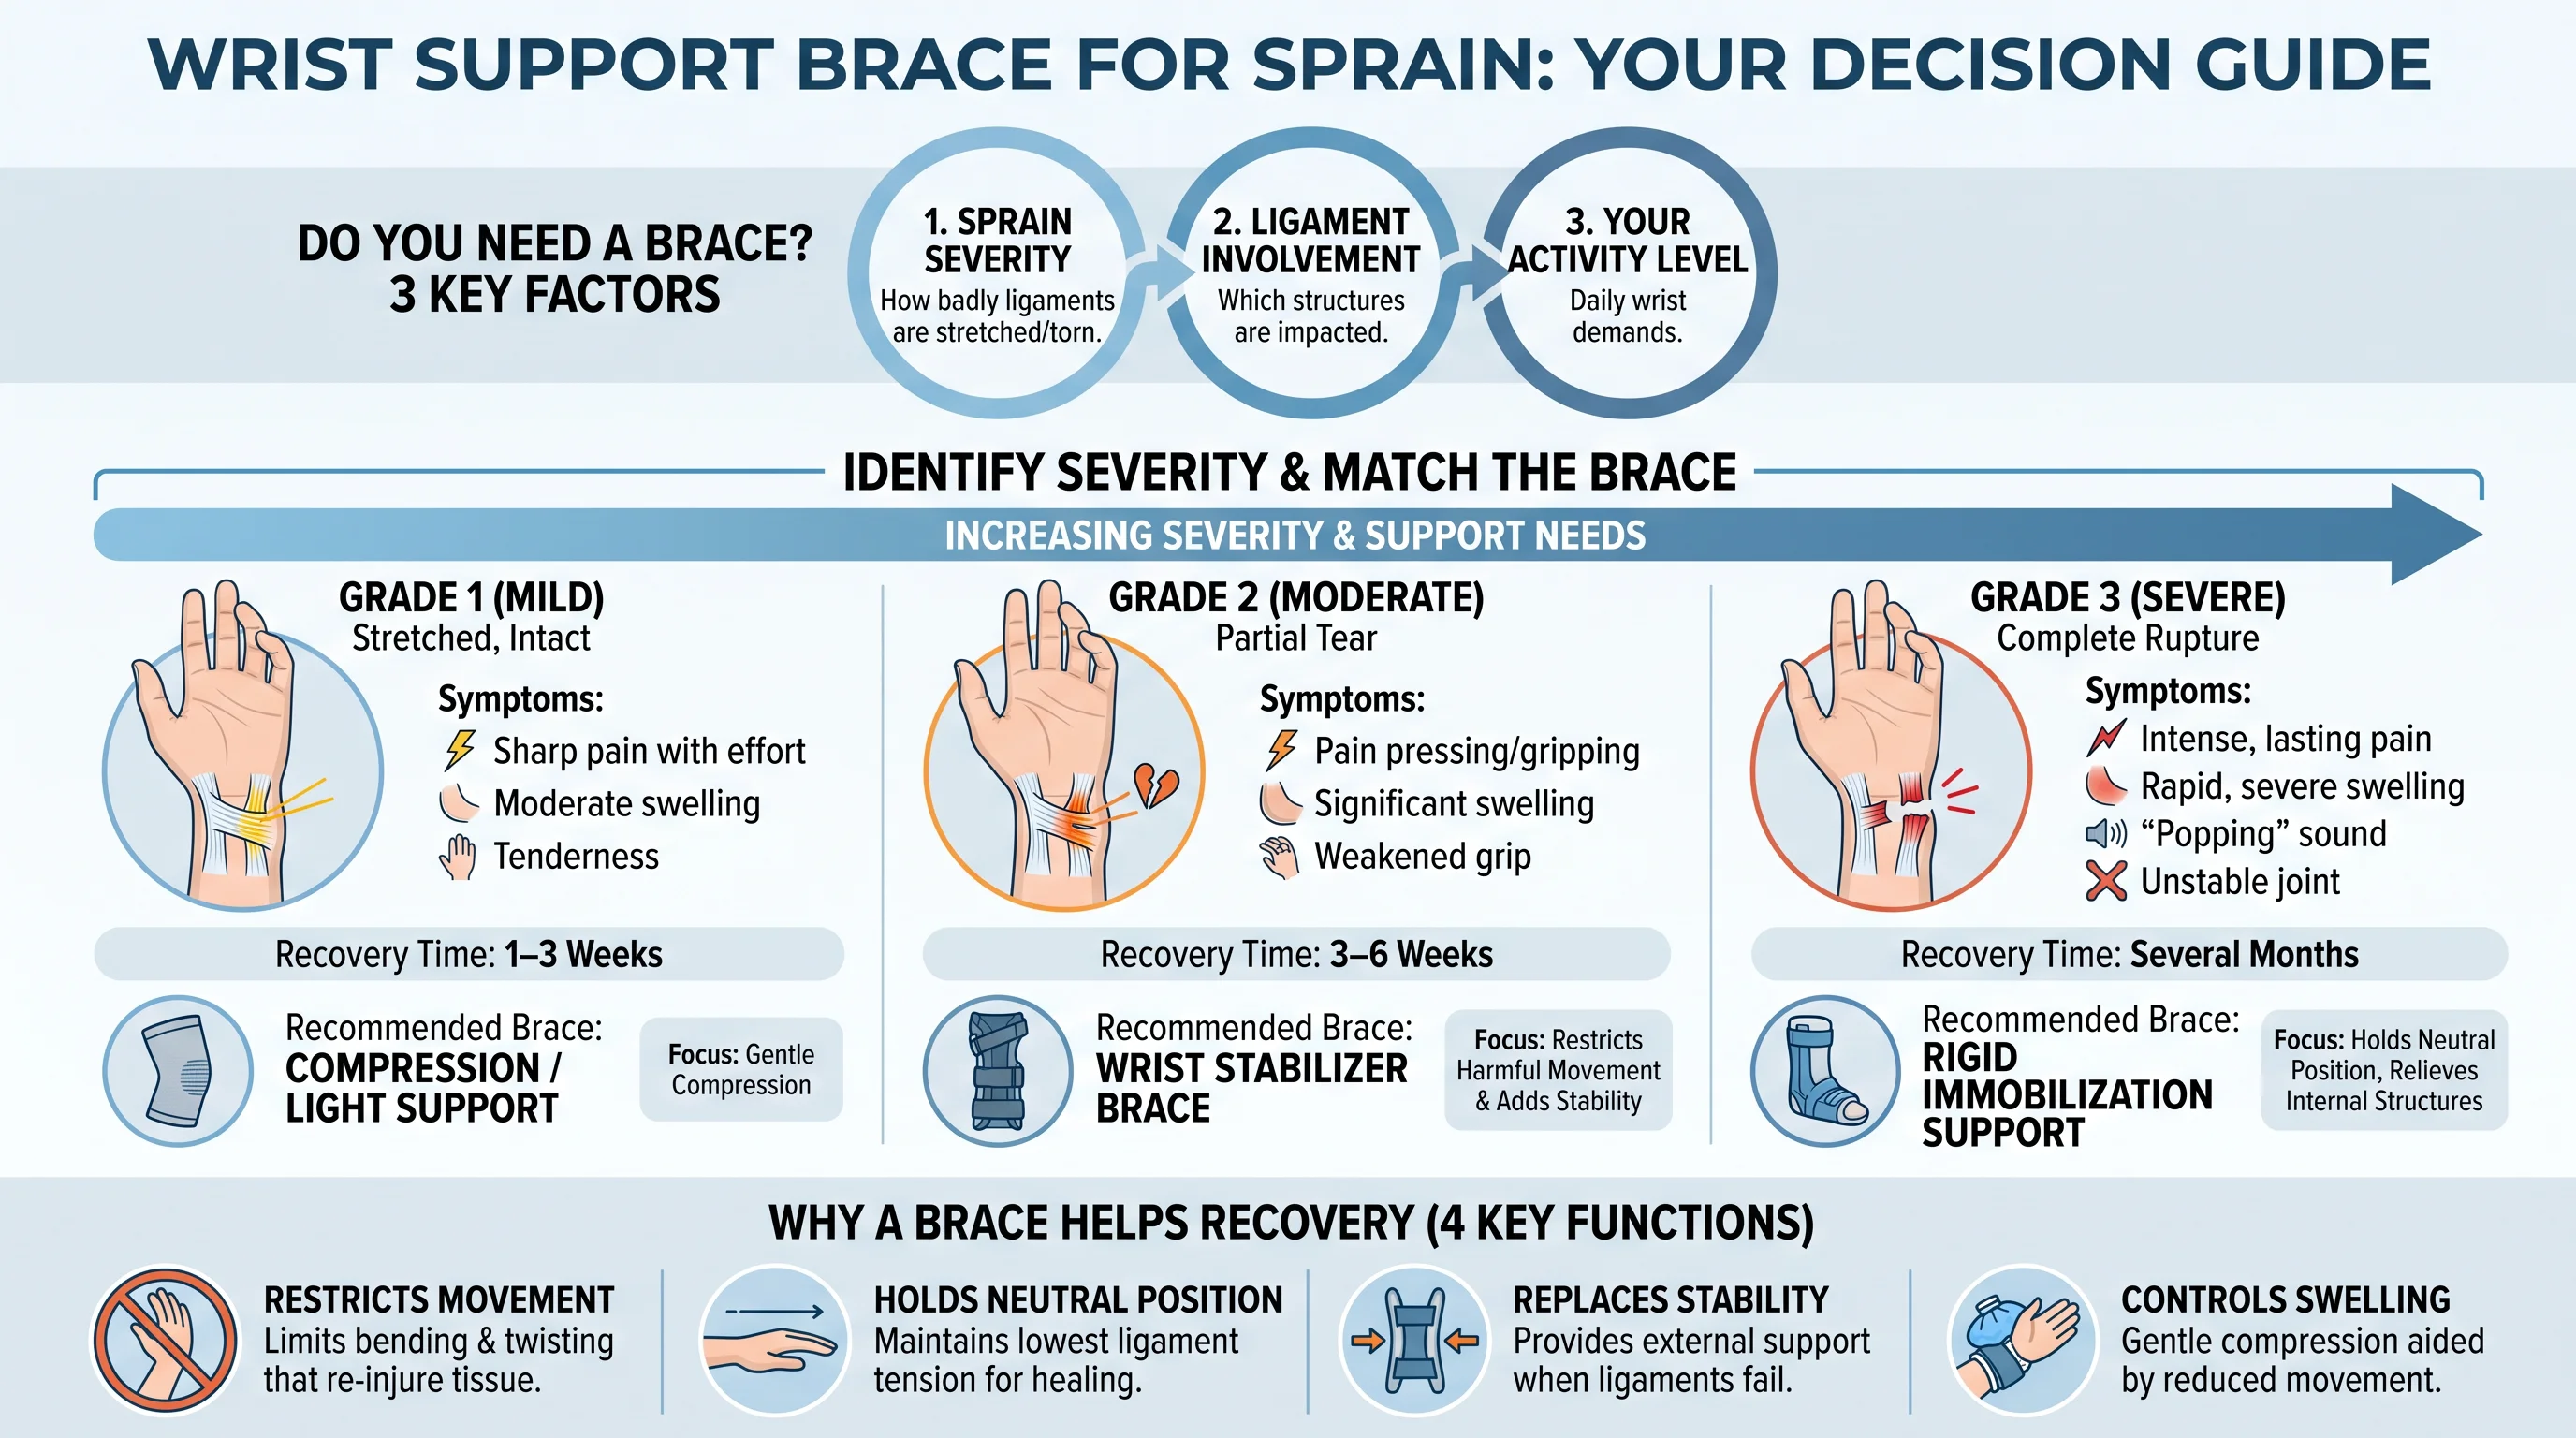
This guide covers what you need to know. You’ll see how to match a wrist stabilizer brace to your injury grade, understand where compression alone works, and know when rigid immobilization support is the right call.
What Is a Wrist Sprain and Why Does It Need Bracing Support?
Ligaments are the real issue here. A wrist sprain means the ligaments connecting your wrist bones got overstretched, torn, or, in serious cases, fully ruptured. The most common cause? Falling and catching yourself with an outstretched hand; clinicians call this a FOOSH injury. A hard twist during sport, a sudden overload, a bad rotation, any of these can do it too.
The clinical grading matters more than most people realize:
Grade 1 — ligament stretched but intact; heals in 1–3 weeks
Grade 2 — partial tear; recovery takes 3–6 weeks
Grade 3 — complete rupture; healing can stretch into several months
Your symptoms tell a clear story. Pain that sharpens when you push off a surface, grip a bottle, or wring a towel. Swelling that appears within hours. Tenderness at a specific point on the wrist. Weakened grip. A popping sound at the moment of injury, that one matters. It points to ligament damage that may be worse than it first appears.
Why a Wrist Stabilizer Brace Changes the Recovery Equation?
A torn ligament loses its ability to stabilize the joint. Every small movement risks pulling that damaged tissue further apart. The ligament needs stillness to heal, and movement takes that away.
A wrist immobilization brace fills that gap. Here’s what it actually does:
Restricts harmful movement — cuts down on excessive bending, extension, and rotation
Holds the neutral position — keeps the wrist where ligament tension stays lowest
Replaces lost joint stability — adds external support while internal structures recover
Controls swelling — gentle compression plus reduced movement limits fluid buildup
Wrist joint support isn’t just about comfort. It builds the right physical conditions: stability, reduced tension, controlled inflammation, so the ligament can repair itself.
Wrist Sprain Grades Explained: How Severity Determines the Wrist Brace You Need
Not all wrist sprains are the same. A wrist brace that works well for a Grade 1 injury can fall short for a Grade 2. Knowing where your sprain sits on the clinical scale helps you stop guessing and start recovering faster.
The Three Grades at a Glance
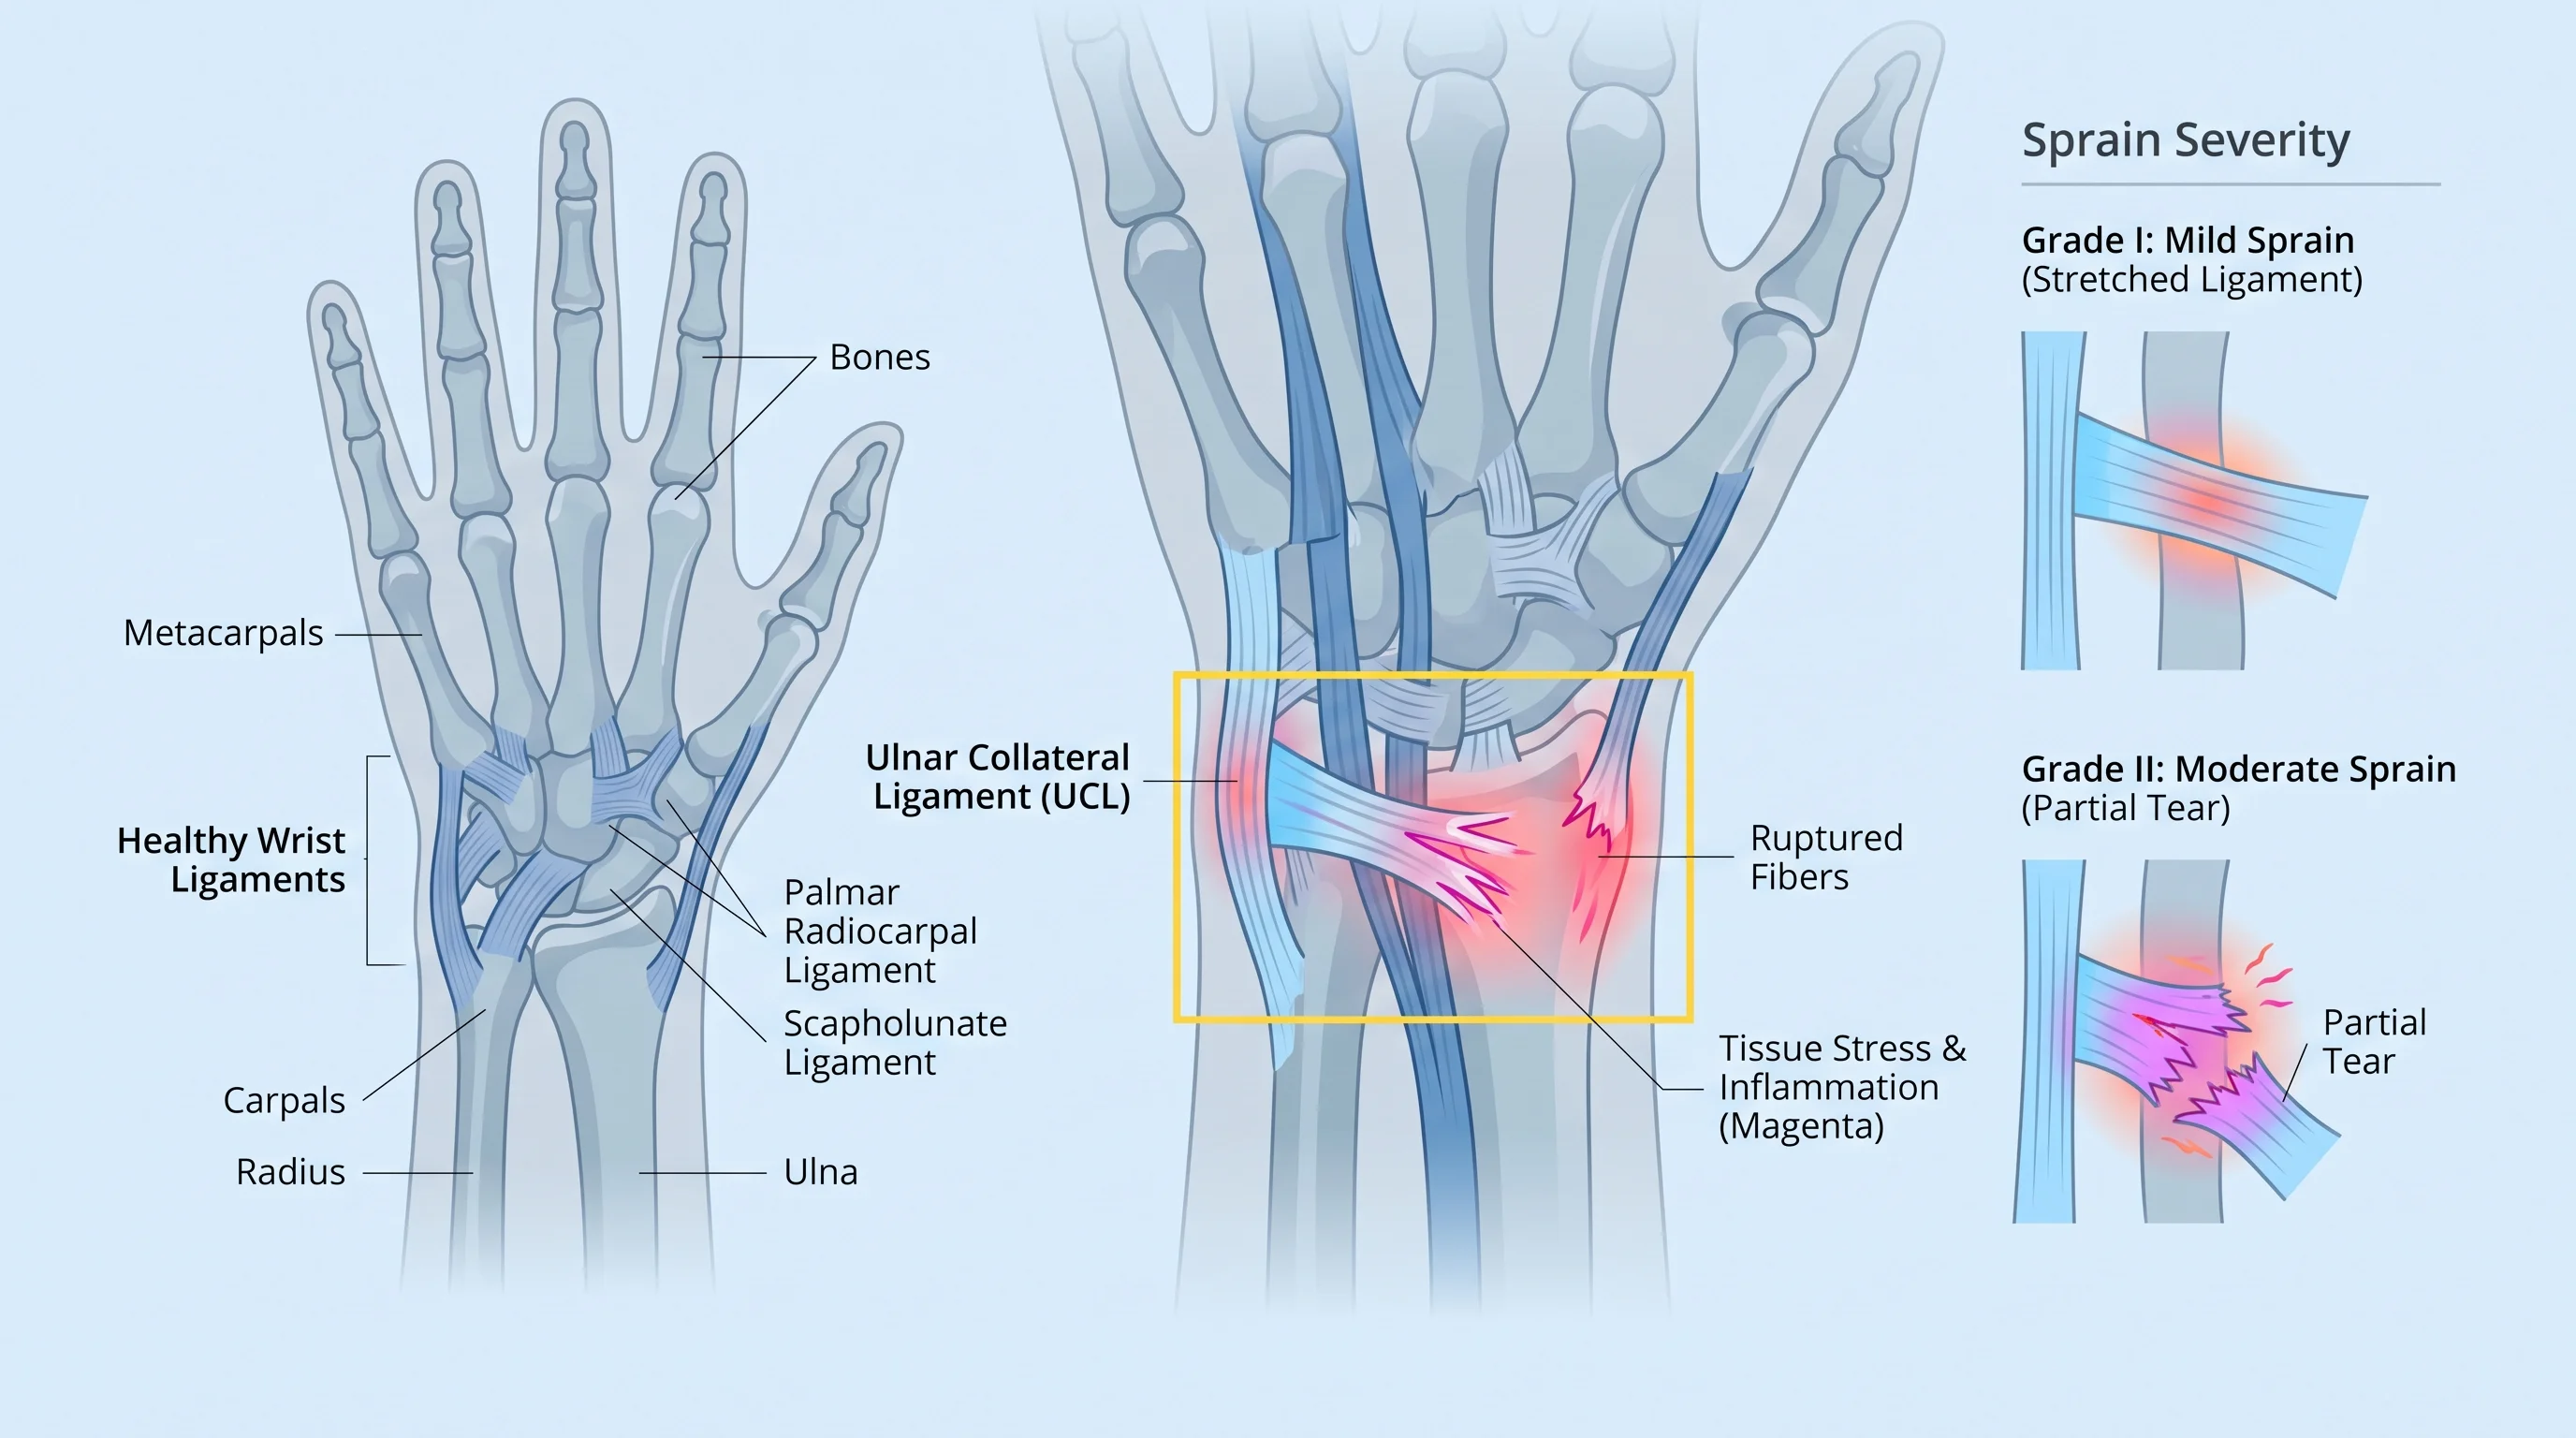
Grade 1 — Mild: The ligament stretches but stays intact. You’ll feel localized tenderness and mild swelling. Pain tends to show up at the end of your range of motion. Grip strength holds up well. Recovery runs 1–3 weeks.
Grade 2 — Moderate: A partial tear. Swelling becomes visible and spreads, sometimes up toward the forearm. Bruising is common. Grip strength drops. Holding a full cup of water feels uncertain or painful. Recovery takes 6–12 weeks, though some cases clear up closer to 4–6 weeks with proper support.
Grade 3 — Severe: Complete ligament rupture. The joint feels unstable — like it could give way under light pressure. You’ll see severe swelling and heavy bruising across both sides of the wrist. Bearing any weight on it is not possible. Recovery spans 3–6 months, and surgical cases can stretch to a full year.
Matching Your Grade to the Right Wrist Brace
|
Grade |
Support Level |
Key Feature |
|---|---|---|
|
Grade 1 |
Soft compression wrap |
20–30 mmHg elastic compression; limits extreme movement without full immobilization |
|
Grade 2 |
Semi-rigid stabilizer brace |
Metal or plastic splint stays; restricts flexion/extension to within ±15° of neutral |
|
Grade 3 |
Rigid medical-grade fixation |
Medical evaluation first; consumer braces work only as post-cast transition support |
Types of Wrist Support Braces for Sprain: Rigid, Moderate, and Compression
Three wrist brace categories exist for a reason, and the difference between them isn’t just materials. It’s about how much movement your healing ligament can handle right now.
Rigid Wrist Braces: Maximum Protection When It Matters Most
A rigid wrist brace is built around one priority: stillness. A metal or hard plastic bar runs along the palm side of your wrist, from the mid-forearm to the center of your hand. Two to three Velcro straps lock it in place. Together, they block 60–100% of flexion and extension, holding your wrist within a 0–15° neutral extension range.
The acute phase covers the first three to seven days after a moderate or severe sprain. Your ligament needs near-complete rest to start repairing itself. Every micro-movement that gets past that hold is a small setback. Rigid braces also make sense after cast removal or post-surgical recovery; internal structures are still fragile at that point.
Best used for: moderate-to-severe sprains, nighttime wear during the first stage of recovery, post-operative support.
One thing to watch: long-term daytime use of a rigid wrist brace can cause stiffness. Once the acute phase passes, reassess your wrist support type.
Moderate Functional Wrist Braces: Support That Works With Your Day
Around weeks two to four, the situation changes. Your wrist still needs structure, but it also needs to move with control, within a set range.
A moderate wrist stabilizer brace is built for that window. The main body is 2–4 mm neoprene or breathable elastic fabric. A soft, removable stay gives partial stabilization without the full lockdown of a rigid splint. Adjustable straps let you fine-tune compression as swelling changes.
The design manages movement rather than stopping it. End-range flexion and extension stay restricted. But typing, lifting a light bag, and getting through a workday? Those become possible again.
Best used for: mild-to-moderate sprains, return to daily activity, repetitive strain, and wrist rehabilitation through the sub-acute phase.
Wrist Compression Sleeves: Swelling Control and Light Support
A compression sleeve is a single-layer elastic or neoprene sleeve: no rigid bar, no hard edges. It wraps the wrist joint with steady, even pressure all the way around.
That external pressure does two things. First, it cuts down swelling by limiting fluid buildup in soft tissue. Second, it gives mild feedback to your joints that discourages fast, reactive movements. Support level is low. Mobility is very high.
Best used for: minor sprains, tendonitis, ongoing swelling during late-stage rehabilitation, and paired with a rigid wrist brace during the acute phase for extra swelling control.
Which Type Fits Your Recovery Stage?
|
Phase |
Recommended Type |
Why |
|---|---|---|
|
Acute (Days 0–7) |
Rigid wrist brace + wrist compression sleeve |
Full immobilization + edema management |
|
Sub-acute (Weeks 1–3) |
Moderate functional wrist brace |
Controlled motion, daily activity support |
|
Late rehab / Return to sport |
Compression wrist sleeve or light moderate wrist brace |
Proprioception, prevention, comfort |
How To Choose the Best Wrist Brace for a Sprained Wrist: 5 Key Factors
Factor 1: Match the Support Level to Your Sprain Grade
Grade 1 (mild): A light compression wrap does the job. Elastic fabric or thin neoprene applies 15–20 mmHg of pressure. It discourages extreme end-range movement without locking anything down.
Grade 2 (moderate): Step up to a wrist brace with splint — one or two palmar or dorsal stays. These reduce your range of motion by 30–50%. You can still type, carry light items, and get through a workday.
Grade 3 (severe): Maximum immobilization. You need bilateral stays, rigid construction, and movement restriction above 70%. The joint holds at neutral, so the ligament gets a real chance to repair.
Factor 2: Sizing and Fit, Measure Before You Buy
Measure the narrowest part of your wrist with a soft tape. Take that number straight to the manufacturer’s size chart.
Industry size reference (approximate):
|
Size |
Wrist Circumference |
|---|---|
|
XS |
11–13 cm |
|
S |
13–15 cm |
|
M |
15–17 cm |
|
L |
17–19 cm |
|
XL |
19 cm+ |
Once it’s on, the fit check is simple: slide one finger under the main wrist strap. It should feel snug but not impossible. Check your fingertips: no blanching, no bluish tone, no numbness.
Also: left and right versions are not interchangeable. Check hand orientation before you buy; this matters with any rigid-stay model.
Factor 3: Material and Breathability — Day Use vs. Night Use
Your wrist will be inside this wrist brace for hours at a time. Material choice matters more than most people expect.
Breathable mesh or perforated fabric (nylon-spandex blends): High airflow, low bulk, moisture-wicking. This is the right pick for all-day office wear, keyboard work, and warm environments.
Ventilated neoprene: Denser, warmer, more compressive. Good for moderate sprains, outdoor activities, and cold-weather recovery, but it runs hot during long indoor wear.
For nighttime use: go with a soft inner lining, a breathable outer layer, and a stable stay. Thick neoprene traps heat during sleep. It raises sweating and often causes skin irritation by morning.
Factor 4: Design Details That Make a Real Difference Day to Day
Thumb loop: This stops the brace from rotating or sliding down your palm mid-task. Thread your thumb through first, center the brace over the palmar side, then fasten the straps in order. A loop that sits too high or too low creates pressure points and gets in the way of gripping.
Removable splints: The best adjustable wrist brace options let you pull the stays out. During the acute phase, keep them in. As recovery moves along and normal hand function returns, pull one or both stays out. The fabric wrap still delivers compression while giving you more natural movement.
Low-profile construction: A brace thicker than 5 mm becomes a problem at a desk. It catches on table edges, bunches under sleeves, and makes mouse work awkward. Flat metal or plastic stays — around 1–2 cm wide and 1–2 mm thick — give you structural support without the bulk.
Factor 5: Match the Wrist Brace to Your Actual Use Case
Post-injury recovery (daily wear): Focus on breathability, adjustability across multiple strap points, and a removable palmar stay. Swelling shifts a lot in the first few weeks. A 3–4 strap closure system lets you retighten as needed — no need to buy a different size.
Sports and repetitive strain: Stability and anti-slip construction come first. A firm closure system and durable fabric hold the brace in place through movement. During active recovery from a wrist ligament injury, use a moderate-to-high support brace with rigid stays. For prevention or mild ongoing strain, a compressive elastic wrap without stays often gets the job done.
When To Start Wearing a Wrist Sprain Brace and How Long To Keep It On?
Timing is everything in wrist sprain recovery.
Put the wrist brace on as soon as pain and swelling appear. That first 48–72-hour window is your acute phase. It’s the most critical stretch of your entire recovery. Each small movement during this window pushes more fluid into the tissue and makes the injury worse. Waiting until it “gets worse” before bracing lets the damage build up fast.
The Phase-by-Phase Wearing Schedule
|
Phase |
Wrist Brace Type |
Daily Wear Target |
|---|---|---|
|
Acute (Days 0–3) |
Rigid / semi-rigid wrist splint |
>80% of waking hours |
|
Sub-acute (Days 3–14) |
Moderate functional brace |
During all active tasks |
|
Recovery (Weeks 2–6) |
Compression sleeve or light brace |
High-load activities only |
About Nighttime Wearing a Wrist Sprain Brace
Night wear isn’t automatic; it depends on your habits and pain pattern. Side sleeper who rolls onto your wrist? Waking up with sharp stiffness each morning? Keeping a lightweight wrist joint support on overnight makes sense. Design matters here. Look for thin, breathable fabric with a soft inner lining. Skip the bulky neoprene shell; it traps heat and irritates skin by morning.
Step-by-Step: How To Wear a Wrist Support Brace for Sprain?
1. Open everything up first.
Unfasten all straps. Lay the wrist brace flat with the padded inner side facing up. Check that the metal or plastic stay sits along the palmar side, the same side as your palm.
2. Thread your thumb through the thumb loop.
Spread your hand open with your palm facing down. Slide your thumb through the opening at the end of the brace. The fabric should sit flat along the thumb web and palm side. Does the wrist brace rotate or bunch? Your thumb isn’t all the way through.
3. Find your neutral position and hold it.
Before you fasten a single strap, set your wrist in neutral. Your palm and forearm form one straight line. Do a quick side-view check: your middle finger and forearm should line up within 10–15°. That’s the position your ligament heals best in.
4. Fasten straps from the wrist outward.
Start with the strap closest to the wrist joint. That one sets your main hold. Then move to the palm strap, then the forearm. Each strap should feel snug but not locked down. Use the one-finger rule: slide one finger under the wrist strap. It should slip in with a little resistance.
5. Do a circulation check before you move on.
Press a fingernail until it turns white, then let go. Color should come back within 1–2 seconds. Tingling, numbness, or a bluish tone in your fingers means the brace is too tight. Loosen each strap by about 5–8 mm and check again.
Wrist Brace for Sprain vs Wrist Wrap: Which One Should You Use?
The confusion is understandable; they look similar, they both go on your wrist, and they both promise relief. But a wrist wrap and a wrist support brace for sprain solve different problems entirely.
Here’s the simplest way to think about it: a wrist brace stops movement. A wrist wrap supports movement.
A rigid wrist brace with a splint limits flexion and extension to less than 15° of your normal range. That’s 10–20% of what your wrist would normally do. A compression wrap keeps most of that range intact. It adds pressure and mild feedback. It does not lock the joint down.
Choose a wrist brace when:
Pain is 7/10 or higher
Swelling is visible, or the joint feels unstable
You need neutral positioning overnight
A ligament is damaged and needs stillness to repair
Choose a wrist wrap when:
Pain sits at 0–3/10 — mild fatigue, light aching, repetitive strain
Your goal is to stop hyperextension during training or lifting
You need fast, adjustable compression during activity
Full range of motion still matters for your task
For an acute wrist sprain, a wrap on its own isn’t enough. It gives low stabilization — helpful for swelling control, but it won’t provide structural support. A wrist stabilizer brace with rigid stays gives damaged ligaments the stillness they need to heal. That’s the key function a wrap simply can’t fill.
These two tools don’t have to compete, though. In early recovery, wear the wrist brace at rest and overnight. As healing moves forward, switch to a wrist compression wrap for low-risk tasks and light activity. The brace handles protection. The wrap handles the return to movement. Used together at the right stages, they cover the full arc of sprained wrist recovery.
Can a Wrist Support Brace Prevent Future Sprains?
The Evidence Is Strong in High-Fall Sports
For snowboarding, skateboarding, and inline skating, the data is clear. Studies show that wearing a wrist stabilizer brace or hard-shell wrist guard cuts wrist sprain risk by 83%. Wrist fracture risk drops by around 70%.
You’ve already sprained your wrist once. Now you want to get back on the slopes or ramps. A rigid wrist immobilization brace with a hard palmar guard isn’t being overcautious; it’s the smartest protective choice you can make.
In Gym and Ball Sports, the Picture Is Less Clear
For weightlifting, CrossFit, basketball, and volleyball, direct prevention evidence is limited. Studies on gymnasts found that standard commercial braces didn’t lower injury rates by much, though they did help manage existing pain.
That doesn’t mean bracing is pointless here. You have a history of wrist ligament injury? A light-to-moderate adjustable wrist brace during high-load movements heavy bench press, overhead pressing, hard defensive plays can reduce peak stress on vulnerable tissue. Pair that with grip strength training and technique work. Together, they lower your overall risk.
Prevention vs. Recovery: Choose the Right Wrist Brace Design
A prevention brace isn’t built like an acute-phase splint. Here’s what to look for:
Partial rigid stays — these limit dangerous end-range extension without locking the whole joint
Breathable, lightweight fabric — suitable for long training sessions
Adjustable closure — tighten before intense activity, loosen between sets
Grip-friendly profile — under 5mm bulk so it doesn’t interfere with holding a barbell, racket, or ball
The goal isn’t immobilization. It’s controlled protection: guarding your wrist against the specific angles and forces that caused the original injury. You stay protected and fully mobile at the same time.
Conclusion
In short, choosing the right wrist support brace for a sprain comes down to three things: matching the brace’s support level to your injury grade, ensuring a proper fit, and wearing it at the right times—especially during activity and, if needed, at night.
Browse the custom wrist brace solution of AOFIT. You’ll find lightweight wrist compression wraps for mild sprains, plus structured stabilizer braces built for serious ligament recovery. Pick the one that fits your current stage of healing. Then wear it with commitment.